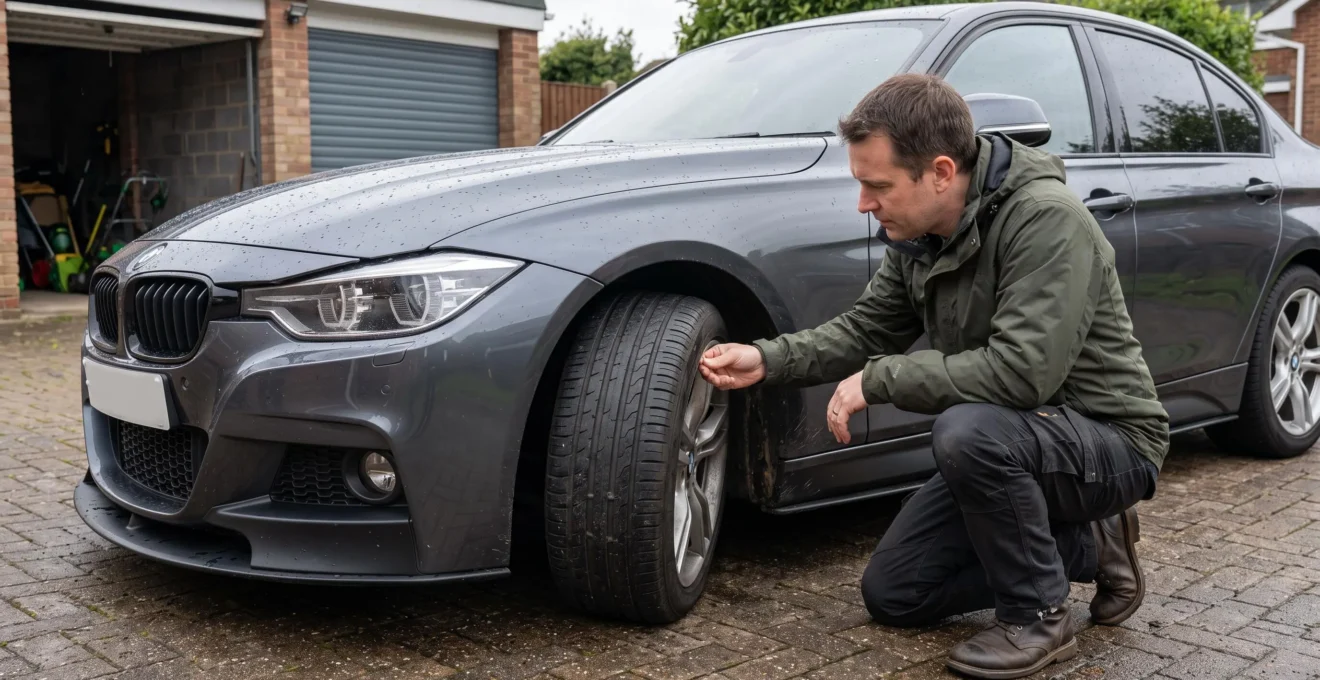
The exterior modifications that still look good after six months are usually those designed for ordinary driving, installed on properly prepared surfaces and maintained according to their materials. OEM-style painted trim, well-fitted ABS or polyurethane accessories and professionally installed automotive vinyl can retain an attractive finish. None is automatically durable simply because it carries a premium label.
Six months of rain, ultraviolet exposure, road grime, temperature changes and repeated cleaning can reveal weaknesses hidden in installation photographs. A vinyl edge starts lifting, a side skirt develops stress marks, or a splitter scrapes every time the car enters a driveway. Other modifications may look immaculate but interfere with parking sensors or create roadworthiness concerns.
The sensible choice depends on the vehicle, its existing paint, local regulations and the conditions it encounters. Evaluating finish quality, mounting methods, ground clearance, repairability and future removal costs is more useful than choosing a modification based entirely on its appearance when new.
Exterior modifications: what matters most after six months
- Installation determines much of the result: surface preparation, correct film application, secure mounting and compatible finishing systems are essential.
- Daily usability matters: modest OEM+ styling often avoids the clearance problems and repeated abrasion associated with low, projecting aero parts.
- Safety and reversibility come first: check driver-assistance compatibility, local vehicle requirements and underlying paint condition before making permanent changes.
- Why Does a Vinyl Wrap Start Peeling After 3 Hand Washes?
- Why Do Some ‘Premium’ Parts Still Fail Early Despite the Price?
- Which ‘Premium Aftermarket’ Parts Actually Last 2x Longer—and Which Don’t?
- Subtle OEM+ or Aggressive Aero: Which Works Better if You Use Speed Bumps Daily?
- Vinyl Wrap or Respray: Which Is Safer if You Might Sell in 18 Months?
- The Front-End Mod Mistake That Breaks Parking Sensors and Driver Assist
- How to Vet a Body Kit or Wrap Installer Without Getting Burned
- When Should You Install Exterior Mods to Avoid Paint Damage and Rework?
Why Does a Vinyl Wrap Start Peeling After 3 Hand Washes?
A vinyl wrap that starts peeling after three hand washes may have suffered from poor edge adhesion, excessive stretching, inadequate post-heating, unsuitable surface preparation or aggressive cleaning. The location and progression of the lifting help identify the likely cause. Three washes are not a recognized failure threshold, and early peeling alone cannot establish installer fault.
Installation-related adhesion problems often appear around recessed bumper sections, door-handle contours, wheel arches and deeply curved panels. These areas place greater demands on film application because the material must conform to complex shapes while retaining sufficient adhesion.
If vinyl has been overstretched or incorrectly post-heated, residual tension can contribute to lifting. Contaminated surfaces and poorly finished edges can create similar symptoms. Conversely, repeated rubbing, harsh cleaners or directing water forcefully against an exposed edge may worsen an otherwise localized weakness.
The location of the failure is more informative than the number of washes. A small lifted corner and a widening separation inside a deep recess represent different levels of concern.
Inspect the affected area under good lighting without pulling the film farther away. Look for trapped moisture, visible contamination, stretching marks and exposed paint. Compare photographs over several days to determine whether the lifted area is expanding. If the underlying paint appears damaged, avoid manipulating the film until a professional has assessed it.
Hand washing is not automatically harmless. Dirty mitts, abrasive towels, concentrated cleaners and excessive friction can scratch or dull vinyl. Matte and satin surfaces also require suitable cleaning products because unwanted polishing or staining may alter their appearance.
3M‘s after-installation product care instructions recommend hand washing its vehicle wrap films where possible and warn against abrasive cleaning. For its vehicle wrap film, 3M also specifies avoiding washing during the first 72 hours after installation. These instructions are product-specific, not a universal rule for every brand.
Before requesting a repair, collect dated close-up photographs, the installation invoice, film identification and a description of the cleaning method used. Ask the installer to assess whether the problem relates to workmanship, material performance, underlying paint or maintenance. Warranty coverage depends on the applicable terms and the evidence.
Simply pressing loose vinyl back into place may temporarily improve its appearance without resolving the cause. A localized professional repair can be appropriate, but progressive lifting or compromised paint may require removing and replacing the affected material. Similar attention to installation quality applies to rigid exterior components.
Why Do Some ‘Premium’ Parts Still Fail Early Despite the Price?
Premium aftermarket parts can fail early because expensive materials do not guarantee compatible coatings, secure installation or resistance to everyday stresses. Carbon fiber may suffer clear-coat deterioration, while a well-designed plastic part can remain visually stable. Durability depends on the complete component, including its finish, mounting hardware, underlying surfaces and exposure conditions.
A carbon-fiber spoiler may look impressive when new, yet its exposed coating can deteriorate under sunlight and weather if the finishing system is unsuitable. A painted ABS accessory can also develop problems if surface preparation or paint adhesion is inadequate.
The advertised material is only one part of the durability equation. A component must withstand its mounting stresses as well as its environmental exposure.
Temperature changes can create movement between materials with different thermal expansion characteristics. If a rigid accessory is attached without adequate allowance for that movement, stress may concentrate around fasteners and mounting points. In other cases, an incorrectly positioned bracket may rub against painted bodywork until visible marks appear.
Hypothetical example: a premium spoiler with an imperfect mounting system
A driver installs an expensive composite spoiler that initially aligns perfectly with the trunk lid. However, its mounting points do not adequately accommodate movement, and protective contact surfaces are poorly finished.
After several months of temperature changes and normal driving, localized stress marks appear near an attachment point, while slight movement causes paint abrasion beneath the mounting surface. This hypothetical scenario illustrates a compatibility problem rather than proving that composite spoilers generally fail early.
Different symptoms indicate different possible weaknesses. Discoloration can suggest coating deterioration or contamination. Rust around a fastening point may indicate insufficient corrosion protection. Localized cracking can be associated with impact, concentrated mounting stress or a component defect.
None of these signs independently proves a manufacturing fault. Assessment requires examining the component, installation method and history of use.
Road salt, moisture, ultraviolet exposure and cleaning chemicals also affect different materials differently. Fasteners may corrode while the decorative surface remains intact. A painted part may retain its shape but lose finish quality. An adhesive overlay may keep its color while its perimeter begins separating.
The strongest purchasing strategy is to examine the complete finish system: substrate, primer, coating, adhesive, mounting hardware and contact surfaces. Ask whether these components are specified to work together and whether replacement or repair is practical.
A premium component earns its value through documented compatibility, consistent workmanship and maintainable performance—not its material label. Comparing common exterior materials by their actual failure modes makes that distinction easier.
Which ‘Premium Aftermarket’ Parts Actually Last 2x Longer—and Which Don’t?
No broad category of premium aftermarket exterior parts can reliably be described as lasting twice as long without comparable testing. Quality OEM-style painted trim, ABS and polyurethane accessories can offer practical durability, while fiberglass, carbon-fiber components and adhesive overlays have different vulnerabilities. The better choice depends on finish quality, impact exposure, mounting reliability and repair costs.
Even the meaning of lasting longer needs definition. A component may retain its color yet develop a loose mounting point. Another may remain structurally intact but require refinishing because its coating deteriorates.
Useful comparisons therefore separate appearance retention from functional durability. The following table describes general characteristics rather than measured lifespan rankings.
| Component type | Potential advantages | Important limitations | Repair considerations |
|---|---|---|---|
| OEM-style painted trim | Integrated appearance and potentially consistent finish quality | Paint chips, abrasion and finish mismatch remain possible | Refinishing or individual part replacement may be practical |
| Quality ABS accessories | Relatively light construction and useful flexibility in suitable designs | Mounting stress, deformation and coating problems depend on design and installation | Minor finish damage may be repairable; cracked components require assessment |
| Polyurethane accessories | Potential flexibility when encountering minor contact | Surface preparation, dimensional stability and finish compatibility vary | Repair options depend on the formulation and damage |
| Fiberglass components | Can support complex shapes and custom finishing | Localized impacts and stressed mounting points can initiate cracks | Composite repair and refinishing may be needed |
| Exposed carbon-fiber components | Distinctive appearance and potentially favorable strength-to-weight characteristics | Coating deterioration, exposed edges and mounting defects can affect appearance | Specialist refinishing or composite repair may be costly |
| Decorative adhesive overlays | Limited disassembly and potentially straightforward cosmetic customization | Adhesive edges, surface preparation and underlying paint condition matter | Replacement may be easier than refinishing, subject to removal risks |
To validate a claim that one product lasts twice as long, compare a defined failure point under equivalent conditions. That could mean time until visible fading, first adhesion failure, loss of mounting integrity or replacement. Products should be compared using equivalent exposure, installation quality and maintenance.
Without that evidence, a claimed lifespan multiplier is a marketing assertion rather than a verified durability advantage.
For a practical six-month evaluation, use an appearance-retention scorecard. At installation and again after six months, photograph and assess color consistency, gloss or matte uniformity, edge integrity, panel alignment, fastener condition and cleaning difficulty.
Record each criterion as unchanged, minor deterioration or significant deterioration. This descriptive approach helps identify the nature of wear without presenting an invented scientific durability score.
Repairability can matter more than nominal lifespan. A replaceable lower splitter extension may be preferable to an integrated painted assembly if both encounter frequent road contact. Similarly, an individually replaceable trim piece may be more economical to maintain than a composite accessory requiring specialist refinishing.
Check the availability of replacement hardware, individual components and matching finishes before purchasing. Manufacturer specifications, relevant test information and documented long-term owner experiences are more useful than pristine showroom photographs.
Ultimately, a more expensive part is not necessarily the longer-lasting one. Its value comes from predictable performance under the conditions the vehicle actually encounters—including the obstacles on everyday routes.
Subtle OEM+ or Aggressive Aero: Which Works Better if You Use Speed Bumps Daily?
Subtle OEM+ styling is generally the more practical choice for a daily-driven car that regularly crosses speed bumps or steep driveways. Aggressive splitters, side skirts and diffusers can reduce usable clearance or extend vulnerable bodywork beyond the original profile. Actual suitability depends on vehicle geometry, suspension movement, load and the design of each component.
Ground clearance alone does not describe the full risk of scraping. Front overhang and approach angle influence whether a splitter contacts an obstacle before the wheels begin climbing it. Side-skirt position, wheelbase and breakover geometry also affect clearance over raised surfaces.
Two cars with similar measured ride heights may therefore behave differently over the same ramp.
Before purchasing a low-mounted accessory, measure the vehicle’s existing lowest points and the projected position of the proposed part. Consider its mounting brackets, which may sit lower than the visible component.
Review regular routes for speed bumps, parking ramps, drainage dips and steep driveway entrances. Measurements taken with an unloaded, stationary vehicle do not fully capture clearance when passengers, cargo, suspension compression or changing road angles are involved.
Repeated minor contact can become a larger finish problem. Scraping may initially affect only the underside of a splitter, but continued contact can expose substrate material, damage paint, loosen attachments or initiate cracks.
A replaceable lower extension may make maintenance simpler than repairing an integrated, painted bumper section. The trade-off depends on the accessory’s construction and whether the replaceable element is properly secured.
For daily use, prioritize components that preserve practical clearance, follow the vehicle’s proportions and have accessible, replaceable mounting hardware. Aggressive styling is not inherently unsafe, but a design that repeatedly strikes ordinary obstacles is a poor match for that driving environment.
Roadworthiness must also be considered. Great Britain’s DVSA‘s MOT inspection rules for vehicle bodies and attachments include spoilers, undertrays and body panels. Insecure components or modifications likely to cause injury can result in inspection defects, with components likely to detach treated particularly seriously.
These provisions apply to the relevant Great Britain inspection framework. They do not establish a universal minimum splitter height or automatically determine legality in the United States, Canada, Australia or other markets. Local rules regarding attachment security, projections and roadworthiness must be checked separately.
The modification that survives repeated daily use will usually be the one that fits the route as well as the vehicle. Owners anticipating a future sale should also consider how easily a chosen finish or component can be returned to its original condition.
Vinyl Wrap or Respray: Which Is Safer if You Might Sell in 18 Months?
A professionally installed vinyl wrap over sound factory paint is generally the more reversible option if the vehicle may be sold in 18 months. However, safe removal is not guaranteed, particularly where paint has been repaired or weakened. A respray changes the paint history more permanently, while retaining presentable factory paint may minimize both financial uncertainty and resale questions.
Wraps offer a way to change a vehicle’s appearance without immediately replacing the original finish. Their reversibility depends on the film, adhesive, underlying paint condition, exposure history and removal process.
According to 3M’s technical bulletin on graphic film removal, published as Revision A in December 2024, removal difficulty is influenced by material construction, substrate condition and environmental exposure. The bulletin also warns that inadequately cured or compromised painted surfaces can create removal problems.
Reversible does not mean risk-free. A wrap removed from sound original paint presents a different risk profile from the same film applied over poorly bonded repair paint.
A respray may be appropriate when existing paint requires substantial repair or when a permanent finish is genuinely desired. Nevertheless, repainting introduces considerations around color consistency, paintwork documentation and potential buyer questions about previous damage.
The decision becomes clearer when resale objectives are considered alongside the present condition of the vehicle.
| Vehicle or ownership situation | More sensible starting option | Main consideration |
|---|---|---|
| Sound factory paint with a temporary color preference | Quality removable wrap | Confirm film compatibility, maintenance and eventual removal costs |
| Attractive factory paint with no defects | Retain the original finish | Avoid unnecessary alteration and additional expense |
| Damaged or poorly repaired paint | Professional paint assessment before either modification | Weak coatings can complicate adhesion and removal |
| Permanent color change desired | Professional respray may be appropriate | Account for preparation, finish consistency and permanent paint history |
| Partial visual accent wanted | Limited compatible film or removable trim | Limit alteration while maintaining a consistent appearance |
Future buyers may question inconsistent panel finishes, an unusual color change or missing paintwork records. Retain photographs taken before modification, invoices for paint repairs, film details and installation documentation. These records help prospective buyers evaluate the work without assuming that every changed finish conceals collision damage.
The six-month appearance test is only an intermediate milestone. A wrap that looks excellent after six months must remain presentable over the remainder of ownership or be removed before listing. Budget for professional removal, possible paint correction and any necessary finish restoration.
Color changes may also trigger insurance notification or registration requirements depending on the jurisdiction and policy. Confirm those obligations locally rather than assuming that cosmetic reversibility removes them.
Preserving resale flexibility means choosing modifications that can be explained, maintained and removed where appropriate. But reversibility should never outweigh safety, particularly when exterior alterations affect modern driver-assistance equipment.
The Front-End Mod Mistake That Breaks Parking Sensors and Driver Assist
The most serious front-end modification mistake is installing an aftermarket grille, bumper cover, trim overlay or license-plate bracket without verifying compatibility with the vehicle’s sensors. A component can obstruct a camera, change ultrasonic sensor positioning or affect radar transmission. Even when dashboard warnings are absent, proper operation of driver-assistance systems cannot be assumed.
Modern vehicles may integrate front parking sensors, radar units, cameras and other equipment into the bumper, grille and surrounding structures. Exact locations depend on the model year, trim, equipment package and market.
These technologies do not respond to modifications in identical ways. An ultrasonic sensor can be affected by unsuitable positioning or surrounding geometry. A camera may lose visibility if a decorative accessory enters its field of view. Radar performance can be influenced by materials, coatings or structural changes in the signal path.
A visibly clear sensor is not necessarily an unaffected sensor. Changes to alignment or the material in front of a radar unit may matter even when the component appears unobstructed.
Ford specifically identifies such risks in Ford‘s driver assistance systems overview. The manufacturer warns that unapproved accessories, body modifications, paint and wraps may interfere with driver-assistance functionality.
This is vehicle-manufacturer guidance, not a claim that every aftermarket bumper necessarily causes a malfunction or that Ford’s specific procedures apply to other brands.
Before buying a front-end component, identify the exact vehicle configuration and obtain relevant manufacturer repair information. Map the installed sensors, check the proposed part’s compatibility documentation and establish whether its design has been evaluated for those systems.
During installation, manufacturer-specified mounting angles, brackets and positions must be maintained. Depending on the vehicle and work performed, diagnostic checks, calibration or both may be required. A qualified technician should determine the applicable procedures and provide evidence of completion where appropriate.
Do not rely on an absence of warning lights as proof of correct ADAS performance. Some issues may only appear under specific operating conditions, making proper verification more important than a short parking-lot test.
Legal requirements are also jurisdiction-specific. In the United States, federal vehicle equipment and safety requirements coexist with state-level registration, inspection and equipment rules. Great Britain operates a different roadworthiness framework, while other English-speaking markets have their own requirements.
Check lighting visibility, number-plate positioning, component attachment and the continued operation of required safety equipment. An aftermarket modification should not compromise an original safety function merely to improve appearance.
Front-end modifications should only proceed when their compatibility can be established for the actual vehicle. That makes the installer’s technical competence just as important as the accessory itself.
How to Vet a Body Kit or Wrap Installer Without Getting Burned
A reliable body-kit or wrap installer should provide evidence of durable workmanship, explain the technical process and define responsibilities in writing. Fresh portfolio photographs are not enough. Look for comparable vehicles photographed after months of use, product-specific installation methods, clear warranty terms and documented procedures for correcting defects or verifying affected vehicle systems.
Start by asking for examples involving the same vehicle generation or similarly complex components. Request close-up photographs of wrap edges, recessed areas, bumper gaps, painted finishes and mounting points after normal use.
Six-month-old workmanship evidence is particularly useful because it may reveal lifting, finish inconsistencies or alignment changes that completion-day photographs cannot show. An installer who cannot provide long-term examples is not automatically unsuitable, but the absence of evidence increases uncertainty.
The technical discussion should match the intended modification. For wrapping, ask about cleaning and surface preparation, film identification, treatment of recessed areas and manufacturer-specific post-heating procedures.
For body kits, ask whether components will be trial-fitted before painting, how the installer handles uneven panel gaps, which fastening methods will be used and how contact with the original paint will be protected.
Specific, verifiable answers matter more than vague assurances. The installer should be able to explain how their process follows the relevant product instructions.
A written quotation should identify the actual material or part, preparation work, disassembly, finishing requirements and acceptable fitment tolerances. Any potential paint correction, drilling, fabrication or sensor-related work should be addressed before installation begins.
Separate the manufacturer’s material warranty from the installer’s workmanship guarantee. Understand who handles an adhesive failure, paint defect or loose component, how the claim is assessed and whether maintenance-related damage is excluded. Coverage should be verified from the applicable written terms rather than assumed from a headline warranty period.
Five checks to complete before accepting exterior modification work
- Verify previous installations: request dated photographs of comparable completed projects after regular use, and save the examples provided.
- Confirm the technical method: obtain a written description of preparation, fitting, finishing and applicable manufacturer instructions.
- Specify materials and responsibilities: secure an itemized quotation listing component identification, finish requirements, any disassembly and sensor-related work.
- Review defect coverage: retain the material warranty, workmanship guarantee, exclusions and written correction procedure.
- Inspect the finished vehicle: create a dated handover record containing photographs of edges, gaps, mounting areas and confirmation of relevant equipment checks.
At collection, inspect both sides of the vehicle under consistent lighting. Compare panel alignment, look for wrap wrinkles or exposed edges, examine accessible mounting points without disturbing them and check the operation of affected equipment.
Record concerns immediately and agree on the procedure for handling issues discovered after exposure to weather or cleaning. A professional handover should establish the vehicle’s starting condition rather than rely on a verbal claim that everything looks satisfactory.
Good installer selection reduces uncertainty, but workmanship also depends on when each stage of the project is completed. Even an experienced professional can face avoidable rework if painting, fitting and wrapping are scheduled in the wrong order.
Key takeaways before scheduling your modification
- Resolve existing paint defects and component fitment questions before committing to final cosmetic finishes.
- Confirm product compatibility, environmental requirements and any sensor-related work before booking the installation.
- Set aside time for proper curing, post-installation restrictions and documented inspections rather than rushing the vehicle back into intensive use.
When Should You Install Exterior Mods to Avoid Paint Damage and Rework?
Install exterior modifications after assessing existing paint and confirming that all components fit correctly, but before applying final decorative films or protective finishes that could be damaged by later work. Body-kit trial fitting, drilling and fabrication should generally precede final painting. Newly refinished surfaces must meet the relevant paint and film manufacturers’ curing and compatibility requirements before wrapping.
The aim is to avoid removing finished parts, cutting through completed coatings or damaging newly installed film to correct an issue that could have been identified earlier.
For a combined body-kit and wrap project, the practical sequence begins with a paint-condition assessment. Existing chips, corrosion, poor previous repairs and unstable clear coat should be identified before deciding which surfaces are suitable for adhesives or refinishing.
Next, trial-fit the proposed components to establish panel gaps, mounting positions, available clearance and any conflicts with original vehicle equipment. Complete authorized drilling or fabrication before final finishing wherever the component design allows.
After confirming fitment, complete the necessary surface preparation and painting. Painted components must cure in accordance with the coating manufacturer’s requirements before receiving compatible wraps, adhesive trims or protective treatments.
There is no universal waiting period for every newly painted panel. Paint chemistry, environmental conditions, repair history and film specifications all influence when another material can safely be applied.
Finishing should take place under suitable workshop conditions. Controlled temperature, dry surfaces and protection from dust and contaminants help reduce avoidable adhesion and coating problems.
Scheduling an installation immediately before heavy rain or cold exposure is not automatically a failure, but the shop must be able to maintain the conditions and post-installation restrictions required for the specific materials. Likewise, intensive washing should not resume before the applicable product instructions permit it.
Once the work is completed, a staged inspection plan helps identify deterioration before it becomes extensive.
- At handover: photograph all modified surfaces, edges, gaps and visible attachment points to establish the original condition.
- After initial use: look for early movement, edge separation, rubbing marks and loose or visibly deteriorating fasteners.
- After demanding weather or cleaning: inspect exposed areas for contamination, water-related problems, coating changes and progressive adhesion failure.
- At six months: compare the vehicle with its baseline photographs and record changes in finish consistency, alignment, security and cleaning difficulty.
Routine grime and superficial marks may require only manufacturer-approved cleaning. Localized finish defects or early adhesion problems may justify professional repair. Cracked structural attachments, potentially detaching components, damaged paint beneath lifting film or suspected sensor interference require a more cautious assessment and may warrant removal or replacement.
Minor deterioration should not be ignored simply because it remains hidden beneath a splitter or behind a wheel arch. Accessible inspection and timely correction help prevent cosmetic problems from developing into more expensive damage.
For the next modification, begin with a documented assessment of paint condition, road clearance and vehicle equipment. Choose a repairable component, confirm the installation sequence and retain the handover photographs. This approach gives the upgrade a better chance of remaining attractive, functional and compliant with applicable requirements after six months of real driving.
Can a car wrap still look new after six months outside?
Yes, a suitable automotive wrap can remain visually attractive after six months outdoors when installed correctly, maintained with compatible cleaning products and used within its intended conditions. However, ultraviolet exposure, contamination, film characteristics and underlying paint condition influence its appearance. Six-month condition should be evaluated through actual inspection rather than assumed from the product category.
Does a more expensive body kit always have a better paint finish?
No. Component price and substrate material do not independently establish finish quality. Surface preparation, primer compatibility, coating application and curing all affect the final result. A less expensive, properly prepared component can have a better finish than an expensive part with poor coating or mounting workmanship.
Should you remove a splitter if its underside is badly scraped?
Removal is not automatically required for superficial abrasion, but deep gouges, visible cracks, loose fasteners or deformation warrant professional inspection. If the component is insecure, likely to detach or interfering with vehicle operation, the vehicle should not continue normal use until the issue is corrected. Local roadworthiness requirements also apply.
Can washing damage a matte or satin exterior finish?
Yes. Abrasive cleaning tools, unsuitable chemicals and repeated friction can alter the appearance of matte or satin surfaces. Use cleaning products and methods approved for the exact film or coating. Avoid assuming that a method suitable for glossy automotive paint is also appropriate for a textured or low-gloss finish.
Do you need to notify your insurer after installing cosmetic exterior modifications?
Notification obligations depend on the insurance contract and jurisdiction. Body kits, color changes, wraps and other alterations may fall within an insurer’s definition of a modification, even when they do not increase vehicle performance. Check the policy and obtain confirmation from the insurer before the work, rather than assuming a purely cosmetic change is exempt.