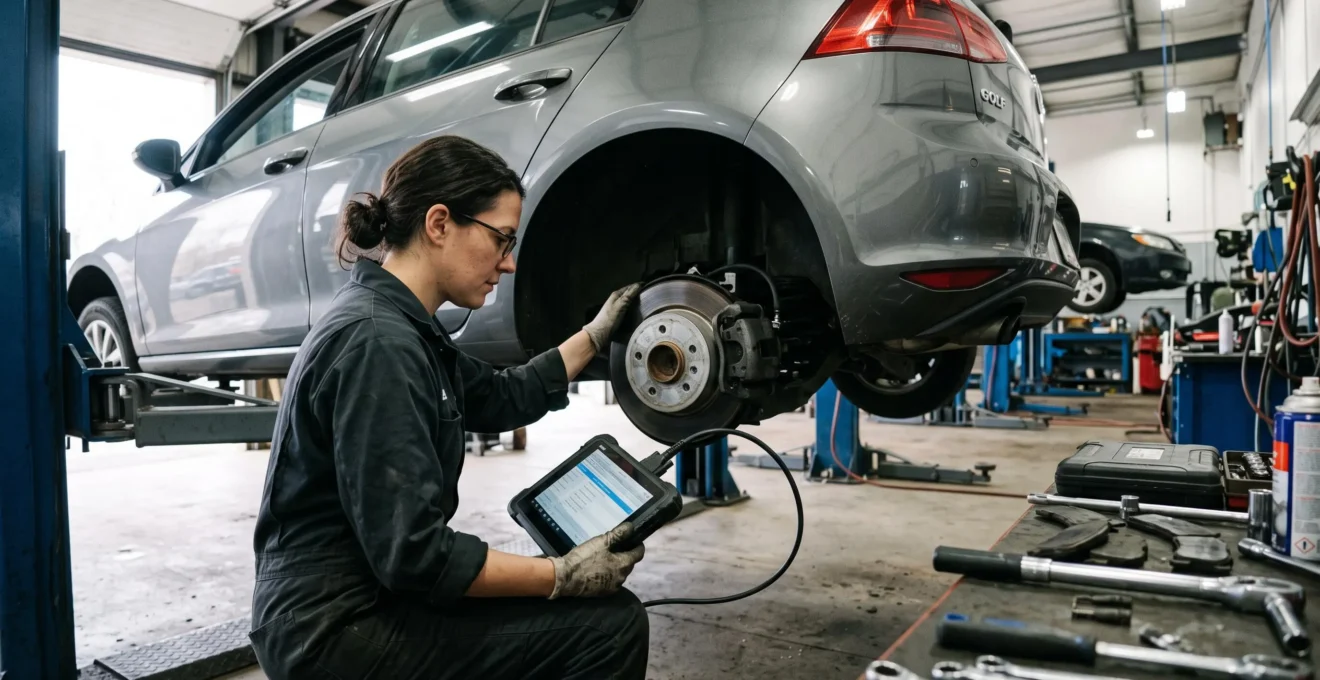
A modern brake pad replacement can involve considerably more than removing a wheel, retracting a piston and fitting new friction material. On vehicles equipped with electronic parking brakes, the technician may need to activate a dedicated service mode, follow a specific piston retraction procedure and perform electronic checks before returning the vehicle to the road.
Similar requirements apply beyond brakes. The wrong fluid specification can compromise system performance, an improperly configured electronic module can create unexpected fault codes, and a replacement windscreen may require camera recalibration even when no dashboard warning appears.
Manufacturer-specific repair procedures establish how these operations must be performed for a particular vehicle, including its model year, equipment and software configuration. Following them reduces avoidable repair errors, helps distinguish existing faults from repair-induced problems and provides evidence that safety-critical work was completed correctly.
For vehicle owners, the practical challenge is not learning to perform every technical procedure. It is knowing which questions to ask and which records demonstrate that the repair followed the correct instructions.
What every modern car owner should know
- Electronic procedures matter: Brake servicing, module replacement and camera calibration may require diagnostic equipment and manufacturer-defined initialization steps.
- Specifications must be exact: Generic fluid classifications, tightening habits and visual inspections do not always establish compliance with the vehicle’s requirements.
- Documentation prevents repeat problems: Ask for applicable specifications, diagnostic results and calibration confirmation before accepting a completed safety-critical repair.
- Why Can a Brake Job Go Wrong if the Electronic Service Mode Isn’t Used?
- How to Confirm the Correct Fluid Spec Was Used Without Reading a 200-Page Manual?
- Dealer or Independent: Which Is Better for Protocol-Heavy Repairs on Newer Cars?
- The Wrong-Spec Fluid Mistake That Damages Components Over 6 Months
- When Should You Demand Manufacturer Procedures After a Module Replacement?
- When Should You Recalibrate Cameras After a Windscreen Replacement to Avoid Repeat Faults?
- Why Can a « Simple Repair » Be Unsafe Without the Exact OEM Procedure?
- Why Manufacturer-Approved Repair Steps Matter After a Minor Crash at 15 mph
Why Can a Brake Job Go Wrong if the Electronic Service Mode Isn’t Used?
A brake job can go wrong when a technician retracts an electronic parking brake (EPB) caliper without following the manufacturer’s required service procedure. On affected vehicles, forcing the piston against the actuator mechanism can damage internal components or disturb the expected actuator position. Some systems also require initialization after reassembly, so correctly installed pads alone may not complete the repair.
An electronic parking brake uses an electrically controlled mechanism to apply or release parking brake force. Depending on its design, this mechanism may be integrated into the rear caliper. Before brake pad replacement, certain systems require a diagnostic command that moves the actuator into a designated maintenance position.
Without the correct sequence, mechanical piston movement can conflict with the actuator’s position. Potential consequences include damaged gears, incorrect clearance, dragging brakes or electronic faults. These outcomes are design-dependent: skipping service mode does not automatically damage every EPB system.
The Genesis brake service technical bulletin 21-BR-002HG provides a specific example. For the covered 2017–2018 G80 and G90 vehicles, Genesis requires Brake Pad Change Mode before rear caliper removal, followed by designated post-service electronic operations.
“When servicing rear brakes on vehicles equipped with an Electronic Parking Brake (EPB), the Brake Pad Change Mode function must be performed”
The bulletin also describes an Assembly Check function for specified component replacements and an actuator operation sequence after reassembly. These steps demonstrate why a repair may require both physical installation and electronic verification.
When the procedure is incomplete, the resulting symptoms can be mistaken for defective replacement parts. A dragging caliper may produce noise, heat or premature wear, prompting another pad replacement when the actual problem concerns installation, lubrication or actuator initialization.
How can an owner verify service mode? Ask the repairer to identify the diagnostic function used and confirm that all required post-repair steps were completed. A scan-tool report or job record is more useful than an unsupported verbal assurance. Motor sounds or visible actuator movement may indicate operation, but neither proves that the full procedure was followed.
Some EPB systems can store faults related to actuator position, initialization or unsuccessful operations. However, a fault code does not conclusively establish that service mode was skipped, and not every vehicle records a specific service-mode violation. The diagnostic history should be interpreted against the exact manufacturer procedure.
A successful brake repair restores correct friction performance and the expected electronic parking brake operation. The same vehicle-specific approach applies to the fluid circulating through its braking system.
How to Confirm the Correct Fluid Spec Was Used Without Reading a 200-Page Manual?
To confirm the correct brake fluid was used, find the manufacturer’s specification in the vehicle’s owner’s manual, approved service information or brake fluid reservoir guidance, then compare it with the product documented on the workshop invoice. Look beyond a generic DOT rating: the required viscosity classification or manufacturer specification may determine whether a particular fluid is appropriate.
A brake fluid bottle labelled DOT 4 is not necessarily interchangeable with every other DOT 4 product. The DOT classification establishes performance requirements, but vehicle manufacturers may specify additional characteristics, particularly for hydraulic braking systems incorporating electronically controlled functions.
For example, the Ford owner’s manual brake fluid specification identifies Motorcraft DOT 4 LV High Performance Brake Fluid, product designation PM-20, and manufacturer specification WSS-M6C65-A2. It also identifies ISO 4925 Class 6 as an accepted classification for the vehicle covered by that manual.
This distinction matters because low-temperature viscosity affects how fluid moves through hydraulic control components, while boiling-point performance influences resistance to vapour formation during demanding braking conditions. A fluid meeting the required specification is the objective; purchasing a manufacturer-branded bottle is not necessarily mandatory when an explicitly permitted equivalent is available.
Before authorizing the work, ask the workshop to state the exact approved specification and the product it intends to use. At collection, compare that information with the invoice and, where practical, a photograph of the original container showing the specification. An invoice reading only “brake fluid” or “DOT 4” may not provide enough information to verify compliance.
If the system has already been topped up with a different fluid, the decision depends on the actual products involved. Compatible fluids meeting the applicable requirements are not automatically harmful when mixed, but an incompatible product or contamination can change the assessment significantly.
Where fluid identity cannot be established, a workshop should check the manufacturer’s compatibility guidance before recommending further driving, testing or replacement. A complete flush may be appropriate for certain specification errors; petroleum contamination or incompatible fluid chemistry can require inspection and replacement of affected components rather than flushing alone.
Correct fluid selection is ultimately a matter of documented compatibility, not packaging familiarity. A workshop’s ability to make that distinction is also a useful test of its broader technical capability.
Dealer or Independent: Which Is Better for Protocol-Heavy Repairs on Newer Cars?
Neither a dealership nor an independent workshop is automatically better for manufacturer-specific repairs. The deciding factors are access to current OEM instructions, suitable diagnostic equipment, technician competence and documented verification. A capable independent can perform complex repairs correctly, while an authorized dealer may be better positioned for certain new-model software operations, restricted programming functions or manufacturer campaigns.
For routine brake work on a familiar platform, an experienced independent specialist may have everything required: a current service information subscription, a compatible diagnostic tool and knowledge of the relevant service functions.
However, newer vehicles can introduce procedures that depend on recent software updates, manufacturer server access, security authorization or calibration equipment. A general-purpose scan tool capable of reading fault codes does not necessarily support every programming or initialization operation.
Before choosing a repairer, compare actual capabilities rather than assuming that workshop branding guarantees procedural compliance.
| Verification criterion | Authorized dealership | Independent workshop |
|---|---|---|
| Current OEM service information | Generally available through the manufacturer’s network | Ask whether the workshop has access for the exact vehicle |
| Electronic parking brake procedures | Should have applicable factory diagnostic functions | Confirm the tool supports the required functions |
| Module coding and programming | Often equipped for supported manufacturer operations | Capability depends on tools, authorization and subscriptions |
| ADAS calibration | Confirm the necessary equipment and facilities are available | Confirm in-house capability or a qualified calibration partner |
| Fluid and torque specifications | Ask for documented compliance | Ask for documented compliance |
| Repair cost comparison | Request an itemized estimate | Request an itemized estimate including electronic procedures |
Ask three questions before booking: “Which manufacturer service information will you use?”, “Can your equipment perform the required programming or calibration?” and “Will the estimate include the post-repair verification?” A reliable repairer should be able to describe the process and identify any work that must be subcontracted.
Vehicle age matters, but it is not the only consideration. Dealerships may have more direct access to newly released procedures and manufacturer updates. Independent specialists may offer competitive pricing and extensive experience with established vehicle platforms. Individual workshop competence can outweigh either generalization.
Compare the complete repair scope, not simply the quoted labour charge. A less expensive brake service that excludes necessary EPB initialization may become more costly if the vehicle returns with faults, additional diagnostic charges or damaged components.
For repairs involving software-controlled safety systems, ask whether the estimate includes any required subscriptions, calibration work and final diagnostic reports. Those items are part of a meaningful comparison rather than optional paperwork.
The best workshop is the one that can establish exactly what the vehicle needs and demonstrate completion. That becomes particularly important when an incorrect fluid or material may cause damage gradually rather than immediately.
The Wrong-Spec Fluid Mistake That Damages Components Over 6 Months
An incorrect automotive fluid can cause damage that appears weeks or months after servicing, but six months is not a universal failure timeline. The outcome depends on the fluid chemistry, the affected system, temperature exposure, operating conditions and degree of incompatibility. Some contamination creates immediate safety concerns; other specification mismatches may remain unnoticed until performance deteriorates.
Different vehicle fluids serve different functions. Brake fluid transmits hydraulic pressure, automatic transmission fluid supports lubrication and hydraulic operation, and coolant manages heat transfer and corrosion protection. Each system uses materials and components selected for compatible fluid properties.
Several mechanisms can make a fluid-related problem difficult to recognize:
- Seal deterioration: Chemically incompatible fluids can cause certain elastomers to swell, soften or lose their intended properties.
- Reduced thermal performance: Inappropriate brake fluid or moisture contamination may reduce resistance to vapour formation under braking heat.
- Corrosion: Incorrect coolant chemistry or degraded protection can contribute to internal corrosion under relevant conditions.
- Hydraulic or lubrication problems: Incorrect transmission fluid properties can interfere with operation in systems requiring tightly defined characteristics.
These mechanisms are not interchangeable. Using the wrong brake fluid does not produce the same failure pattern as using the wrong coolant, and not every departure from a preferred product designation results in damage.
Hypothetical example: a delayed brake fluid problem
A vehicle receives an undocumented brake fluid top-up. Several months later, its owner notices a change in braking feel during demanding use. The workshop discovers that the original top-up product was not recorded, leaving compatibility uncertain.
This hypothetical situation does not establish that the fluid caused the symptom. It illustrates why a technician must investigate the braking system, determine what fluid was introduced and assess possible contamination before selecting corrective work.
The time gap creates an evidence problem. Without the original invoice, product designation or container information, distinguishing a servicing mistake from an unrelated mechanical fault may become difficult.
Retain the itemized invoice, manufacturer specification and any available product photographs. These records can support an investigation, although they do not independently prove that a particular fluid caused subsequent damage.
When is continued driving acceptable? Only after the potential incompatibility and associated safety risk have been assessed. If a confirmed product meets the vehicle’s approved requirements and no fault exists, no corrective operation may be necessary. An unknown fluid, suspected petroleum contamination, braking abnormalities or evidence of seal damage warrants prompt professional assessment, not a wait-and-see approach.
Depending on the manufacturer’s instructions and the type of contamination, corrective work may involve a fluid exchange, hydraulic testing, seal inspection or replacement of affected components. A flush should never be presented as a guaranteed remedy for chemically damaged parts.
The same principle extends to electronic repairs: incomplete service records make it harder to establish whether a later fault originated with the replaced part, its configuration or another system entirely.
When Should You Demand Manufacturer Procedures After a Module Replacement?
Ask for the applicable manufacturer procedure whenever an electronic control module is replaced, particularly if it controls braking, steering, restraint systems, powertrain operation or driver assistance. Many modules require coding, configuration, software programming, initialization or calibration. The exact steps depend on the vehicle and replacement part; a physically compatible module is not necessarily ready to operate correctly.
Modern control modules exchange information across vehicle networks. A replacement unit may need to recognize the vehicle’s equipment configuration, software compatibility and installed features before it can communicate and operate as intended.
For example, a vehicle may have different configurations for parking assistance, lighting, braking or driver-assistance equipment. Installing a module with incorrect settings could produce missing features, communication faults or warnings in systems that appear unrelated to the replaced component.
This creates a common diagnostic trap: a technician replaces a module to address one fault, but the vehicle subsequently reports several others. The resulting fault codes may reflect incomplete configuration rather than independent failures of each affected component.
Module condition and origin change the requirements:
| Replacement module | Potential requirement | What to verify |
|---|---|---|
| New OEM module | Vehicle-specific programming, coding or initialization where specified | Correct part, software and completed procedures |
| Pre-programmed module | Additional configuration, learning or calibration may still be necessary | Programming scope and vehicle compatibility |
| Used module | Compatibility checks, supported reconfiguration and possible security restrictions | Whether the manufacturer permits the installation and required operations |
Not every module requires online manufacturer-server access or VIN-specific coding. Some replacement modules arrive configured, while others need factory-connected functions. Used-module restrictions also differ between manufacturers and electronic systems.
The repairer should identify the exact replacement procedure before ordering or fitting the part, rather than assuming that clearing fault codes will complete the installation.
Five records to request after an electronic module replacement
- Confirm the replacement part: Request an invoice or job record listing the installed part number and whether it is new, remanufactured or used.
- Identify the OEM procedure: Ask for the applicable service procedure reference or a written description of the required programming and initialization operations.
- Verify configuration: Request confirmation that vehicle-specific options, coding and software compatibility were checked, with VIN association where required.
- Document calibration: Obtain a completion record for any required learning, initialization or calibration functions, including externally performed work.
- Check final diagnostics: Ask for a post-repair scan report identifying the systems checked and any unresolved or unrelated fault codes.
Before authorizing the work, use a direct question: “Will this module require vehicle-specific coding or manufacturer online access, and what record will show that its configuration and required initialization are complete?”
A properly documented module replacement addresses both component compatibility and system integration. Camera-based driver assistance follows a related principle: a component can appear operational while still requiring precise alignment.
When Should You Recalibrate Cameras After a Windscreen Replacement to Avoid Repeat Faults?
A forward-facing driver-assistance camera should be recalibrated after windscreen replacement whenever the vehicle manufacturer’s procedure requires it. The requirement depends on the model, equipment and repair operation. Calibration may use stationary targets, specified driving conditions or both. A functioning camera and the absence of a warning light do not independently confirm that its alignment meets manufacturer specifications.
Many advanced driver assistance systems (ADAS) use cameras mounted near the rear-view mirror to detect road markings, vehicles and other features. Their operation depends on the camera’s physical position, viewing angle and calibration relative to the vehicle.
Replacing the windscreen can involve removing or disturbing camera-related components. Glass geometry, mounting arrangements and installation tolerances may also affect the relevant optical relationship. Even when the replacement glass is compatible with the vehicle, the manufacturer may require calibration before the system is returned to service.
The ANSI/AGSC/AGRSS 005-2022 automotive glass replacement safety standard distinguishes static calibration, performed with the vehicle stationary in a controlled environment, from dynamic calibration, performed while driving under specified conditions.
The standard addresses the use of appropriate equipment, trained personnel and suitable procedures when manufacturer-required recalibration applies. Its provisions belong to a US industry standard and should not be interpreted as identical legal requirements across all English-speaking countries.
Static calibration commonly involves positioning appropriate targets relative to the vehicle in accordance with the specified setup conditions. Dynamic calibration uses a prescribed driving process. Some systems require both operations, and the exact instructions cannot be substituted with a generic target placement or arbitrary road test.
Improper camera alignment may contribute to unexpected driver-assistance warnings, inaccurate lane recognition or inappropriate system behaviour. These symptoms have multiple possible causes, so a calibration defect must be diagnosed rather than assumed.
Clearing diagnostic trouble codes does not replace a required calibration. Likewise, an apparently normal dashboard is insufficient proof: some calibration problems may not trigger an immediate malfunction warning.
Before authorizing glass replacement, ask whether the quoted service includes the required ADAS assessment and calibration. Confirm who will perform the operation, whether additional charges apply and what documentation will be provided. Insurance coverage and payment responsibility depend on the applicable policy, service agreement and jurisdiction.
At vehicle collection, request confirmation of the glass specification, any required calibration operations and their recorded outcome. If calibration could not be completed, obtain a written explanation and any resulting limitations on vehicle use or ADAS functionality.
Camera calibration illustrates a wider safety principle: a repair may appear complete while hidden procedural requirements remain unresolved. Mechanical fasteners, structural components and sensor-equipped assemblies can present the same problem.
Why Can a « Simple Repair » Be Unsafe Without the Exact OEM Procedure?
A seemingly simple repair can be unsafe when the technician substitutes general workshop habits for the vehicle’s specified instructions. Manufacturer procedures identify tightening values, fastener replacement rules, installation sequences and required electronic checks. Ignoring these requirements can leave components incorrectly secured or configured, even when the vehicle appears normal during an initial road test.
Modern vehicles combine materials and assemblies with different mechanical characteristics. Aluminium components, steel fasteners, bonded structures and integrated sensors cannot always be serviced using familiar procedures from older vehicles.
A tightening specification may define more than a torque number. Depending on the joint, the manufacturer may require a particular sequence, a preliminary torque followed by an angle, replacement of a single-use fastener or specific thread conditions.
Consider a wheel or brake caliper mounting fastener. Excessive tightening can damage threads or overstress the fastener or surrounding material. In suitable conditions, a fastener taken beyond its elastic range can experience permanent deformation. Insufficient tightening can create a different risk by allowing movement or loss of clamping force.
Neither outcome is necessarily obvious through visual inspection. A fastener can look correctly seated while failing to meet the required assembly condition.
Using a calibrated torque wrench helps control tightening, but the tool alone does not establish compliance. The technician must apply the correct manufacturer value and method to the correct fastener, including any required replacement or tightening sequence.
The distinction between a repair that works and a repair that is safe becomes especially important under demanding operating conditions. Emergency braking, repeated heat cycles, vibration and road impacts may expose weaknesses that a short test drive does not reveal.
Ask the workshop which service instructions were used for the job. For safety-critical fastening work, request confirmation of the relevant torque specifications, tightening method and any single-use fasteners replaced. Exact values should come from the applicable current repair documentation, not from a generic internet chart.
A technician may not automatically supply a copy of proprietary manufacturer documentation, but should be able to explain how the prescribed instructions were identified and followed. Vague answers do not prove an unsafe repair, although they justify asking for clearer verification before accepting the vehicle.
These precautions become even more important after a collision, when visible cosmetic damage may not reflect the condition of nearby sensors, mounting structures or safety systems.
Key takeaways before accepting a collision repair
- Judge the repair scope by affected systems and manufacturer inspection requirements, not by impact speed or visible damage alone.
- Confirm that relevant sensors, restraint components and structural attachment points were inspected using the appropriate repair information.
- Retain pre-repair findings, documented repair operations and post-repair verification so later faults can be assessed against the work performed.
Why Manufacturer-Approved Repair Steps Matter After a Minor Crash at 15 mph
A collision at 15 mph can require manufacturer-specific inspections and repair procedures even when exterior damage looks minor. Impact speed alone does not establish whether sensors, structural components or restraint systems were affected. The appropriate repair scope depends on the vehicle, collision direction, damage path and manufacturer instructions, including any required diagnostics or calibrations before the vehicle returns to service.
Modern bumpers and body panels often conceal components whose physical condition cannot be confirmed through a quick exterior inspection. These may include radar sensors, camera-related components, mounting brackets, energy-absorbing structures and wiring.
A small change in sensor mounting position can affect alignment requirements. Likewise, structural damage or attachment-point deformation may call for measurements or component replacement that are not apparent from the painted surface.
Manufacturer collision repair information establishes which components should be inspected, measured, repaired or replaced under the applicable circumstances. Depending on the vehicle and damage, those instructions may address sensor brackets, structural bonding, rivets, mechanical fasteners and restraint system components.
Seat belt pretensioners and other supplemental restraint components must be assessed according to the relevant diagnostic and replacement criteria. A minor collision does not automatically mean they require replacement, but an absence of obvious deployment does not eliminate the need for any manufacturer-specified checks.
The I-CAR ADAS collision repair diagnostics process, published January 10, 2017, emphasizes consultation of manufacturer repair information, identification of affected sensors, documentation of diagnostic trouble codes and completion of applicable post-repair calibrations.
It also recognizes that certain damaged or incorrectly functioning systems may not activate a dashboard malfunction indicator. For that reason, simply clearing fault codes or confirming that no warning remains cannot substitute for required inspection and calibration.
A disciplined collision repair process generally involves the following stages, adapted to the specific vehicle and damage:
- Record visible damage, reported symptoms and relevant pre-repair diagnostic findings.
- Consult the applicable manufacturer collision repair and electronic system instructions.
- Inspect affected structures, components, sensor mountings and restraint systems as required.
- Perform approved repairs, component replacements and any necessary programming or calibration.
- Complete post-repair diagnostics, required functional verification and documentation of outstanding issues.
Suppose a vehicle develops intermittent lane-assistance warnings several weeks after a low-speed collision repair. The warnings do not prove that the collision or repair caused a calibration problem. They justify reviewing the original damage assessment, sensor inspection records and calibration history alongside the current diagnostic findings.
Without that documentation, identifying whether the problem existed before the crash, resulted from the impact or followed the repair becomes more difficult.
Repair records can also become relevant during insurance discussions, warranty assessments or later liability investigations. Their significance depends on the circumstances and applicable rules; following a documented manufacturer procedure does not automatically resolve every claim, and deviation does not by itself establish legal liability.
Owners should request a final repair summary identifying any applicable structural inspections, safety-system checks, calibrations and unresolved conditions. Where work was subcontracted, the main repairer should explain how its completion was verified.
Before accepting the vehicle, ask the repairer to explain which manufacturer procedures applied, what was checked and which records confirm completion. Keep that documentation with the vehicle’s service history. This is a practical way to reduce avoidable repeat repairs and make future safety-related faults easier to investigate.
Can a general OBD scanner confirm that an OEM repair procedure was completed?
Not necessarily. A general OBD scanner may read selected diagnostic trouble codes without supporting manufacturer-specific service modes, coding or calibration functions. Confirm that the diagnostic equipment supports the exact vehicle and required operation. A successful scan or the absence of fault codes does not independently prove that every prescribed procedure was completed.
Does an independent workshop need an original manufacturer-branded diagnostic tool?
Not for every repair. Suitable aftermarket diagnostic equipment may support the functions required for particular vehicles. However, some programming, security-related operations or calibrations require manufacturer-authorized access or specific equipment. The workshop should establish tool compatibility and access requirements before accepting the job.
Should a workshop provide a diagnostic report after every brake pad replacement?
Not every brake pad replacement requires a diagnostic scan or a formal electronic report. The appropriate documentation depends on the vehicle and procedure. Where an electronic parking brake service function or initialization is required, ask for a job record identifying those operations and confirming their completion.
Can a repair be considered complete if no warning lights appear?
No warning lights is a useful observation, but not conclusive proof of correct repair. Mechanical fastening errors, fluid specification mismatches and certain calibration problems may not produce an immediate dashboard alert. Completion should be established through the applicable manufacturer procedure, inspection results and any required diagnostic or calibration verification.
What should an owner do if a safety-related fault appears shortly after a repair?
Record the symptoms and contact the repairer for a documented assessment. Provide the original invoice, relevant diagnostic reports and calibration records. If braking, steering or another safety-critical system behaves abnormally, stop using the vehicle when safe and arrange professional assessment or recovery rather than continuing to drive. The cause should be established through diagnosis, not assumed from the timing of the previous repair.