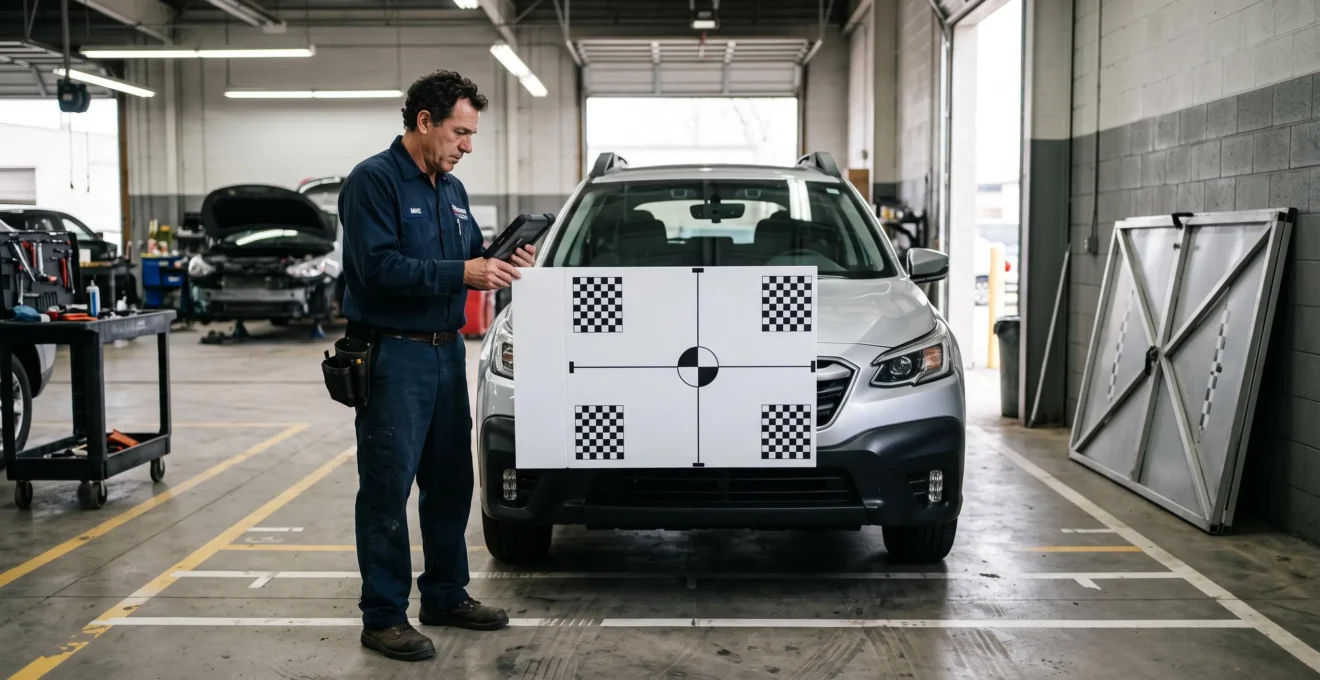
A collision at 15 mph can leave a modern vehicle looking almost undamaged while potentially affecting components that cannot be assessed by appearance alone. Airbag sensors, seatbelt pretensioners, radar brackets, cameras and electronic control modules may require inspection or testing even when the car remains drivable.
Manufacturer-approved repair procedures define how those components must be inspected, repaired and verified. They specify the relevant vehicle configuration, required operations, replacement restrictions and diagnostic or calibration steps. Following them helps establish that a repair meets the manufacturer’s technical requirements rather than merely restoring the vehicle’s appearance.
Importantly, 15 mph is not a universal airbag deployment threshold. Impact direction, deceleration, the object struck and vehicle design all affect the outcome. Nor does every minor collision require every electronic system to be recalibrated.
For owners, the practical objective is straightforward: obtain evidence that the correct procedure was identified, the necessary operations were completed and any remaining faults were investigated before the vehicle was returned to service.
What matters after a minor collision
- Speed alone cannot establish safety. A 15 mph impact may justify restraint-system and sensor inspections even without visible deployment or dashboard warnings.
- Documentation distinguishes an inspected repair from an assumed repair. Request applicable OEM procedure references, diagnostic records and calibration results where required.
- Choose demonstrated technical capability over branding. An independent garage can be suitable when it has the correct information, equipment and expertise for the specific repair.
- Why Can a “Simple Repair” Be Unsafe Without the Exact OEM Procedure?
- How to Verify a Garage Followed OEM Repair Procedures Without Being an Expert?
- OEM-Approved Repairer or Local Garage: Which Is Safer With ADAS Sensors?
- The Non-OEM Parts Shortcut That Can Cause Safety Systems to Misbehave
- When Should You Insist on Calibration Proof After Repairs to Avoid Hidden Faults?
- When Should You Recalibrate Cameras After a Windscreen Replacement to Avoid Repeat Faults?
- Why Can a Brake Job Go Wrong if the Electronic Service Mode Isn’t Used?
- Why Manufacturer-Specific Protocols Matter Even for “Simple” Jobs Like Brakes
Why Can a “Simple Repair” Be Unsafe Without the Exact OEM Procedure?
A seemingly simple repair can be unsafe when the technician overlooks hidden collision damage, uses the wrong repair sequence or fails to complete manufacturer-required checks. Modern vehicles combine structural components, electronic controls and occupant protection systems. Restoring the exterior without checking those connected systems may leave unresolved damage or faults that are not apparent during ordinary driving.
According to the NHTSA airbag safety information, frontal airbags are generally designed to deploy in moderate-to-severe frontal or near-frontal crashes. The agency describes an approximate severity equivalent to striking a fixed barrier at mph or higher, compared with striking a similarly sized parked vehicle at roughly 16–28 mph or higher.
8–14 mph
The NHTSA’s approximate fixed-barrier impact-speed equivalent for moderate-to-severe frontal collisions. This is not a universal airbag deployment threshold, and travelling speed alone cannot predict activation.
National Highway Traffic Safety Administration, Air Bags.
This distinction matters after a reported 15 mph collision. The damage assessment must consider the actual impact conditions and the vehicle’s equipment, not assume that a relatively low road speed excludes restraint-system involvement.
Airbag control units, crash sensors, pretensioners and, where fitted, battery safety-disconnect systems may have different inspection or replacement requirements. A battery disconnect or pretensioner should not be assumed to have activated merely because the collision occurred at a particular speed.
OEM procedures also define the order of operations. Depending on the vehicle, technicians may need to isolate electrical systems, inspect components, perform specified measurements and restore connections in a prescribed sequence. Structural adhesive applications can similarly involve manufacturer-specified materials, surface preparation and curing conditions.
A repair completed out of sequence can compromise an intended safety measure even when the finished assembly looks correct.
Electronic diagnostics add another distinction: a system that appears operational has not necessarily passed every required verification. Some collision events may generate stored diagnostic information or trigger manufacturer-specific actions involving restraint modules. However, stored crash information does not universally disable an airbag system, and event-data records must not be confused with ordinary diagnostic trouble codes.
Any reset, replacement or initialization must follow the applicable manufacturer’s service instructions rather than a generic crash-data clearing service.
The next challenge is determining whether a garage actually followed those instructions. That assessment should depend on records and measurable results, not on the repaired vehicle’s appearance.
How to Verify a Garage Followed OEM Repair Procedures Without Being an Expert?
Vehicle owners can verify much of a repair without understanding its technical details by requesting three categories of evidence: the applicable manufacturer procedure, before-and-after diagnostic reports, and documented calibration results where required. These records do not independently guarantee that every operation was performed correctly, but they make the repair more traceable and reveal missing verification steps.
The I-CAR collision repair diagnostics best practice recommends identifying the manufacturer’s repair requirements, documenting relevant vehicle faults before repair, completing required calibrations and carrying out post-repair diagnostics.
A pre-repair diagnostic scan provides a baseline. It may identify current, pending or historical diagnostic trouble codes involving restraint systems, driver assistance equipment and other electronic functions. Those codes must be investigated: their presence does not automatically prove collision-related damage.
Where collision damage prevents safe initial diagnostics, the scan should take place as soon as the repair conditions permit.
A post-repair scan establishes which faults remain detectable after the work and may identify additional diagnostic steps. It does not, by itself, demonstrate that physical sensor alignment, structural dimensions or every safety function is correct.
For a practical document review, use the following checklist before accepting the vehicle.
Five records to request from your repairer
- Identify the applicable procedure. Ask for the manufacturer, model, model year, procedure title or reference, and relevant revision information where available. Keep the reference with the repair invoice.
- Obtain the pre-repair scan. Request a dated diagnostic report identifying the vehicle, systems scanned and recorded trouble codes. Note any explanation of a missing initial scan.
- Obtain the post-repair scan. Request the final diagnostic report and written explanations for unresolved codes, incomplete tests or systems that could not be assessed.
- Collect required calibration evidence. Ask for a report identifying the vehicle, the calibrated system, calibration method, equipment and completion result, with numerical values where the procedure or equipment provides them.
- Confirm the repair scope. Ask for an itemized invoice or work record connecting replaced parts, structural operations, required checks and outstanding work to the applicable procedures.
Be cautious if the garage provides only a generic scan summary, an unidentified calibration printout or verbal assurances that its process is equivalent to the manufacturer’s. A calibration record does not have to contain universal numerical target values or a standardized certificate number; what matters is whether it adequately documents the required process for that vehicle.
Similarly, the absence of a particular document format is not automatically evidence of improper repair. The technician should be able to explain what the manufacturer requires and how completion was recorded.
Once the available documentation is understood, choosing between a manufacturer-approved repairer and an independent garage becomes a more informed decision.
OEM-Approved Repairer or Local Garage: Which Is Safer With ADAS Sensors?
A manufacturer-approved repairer is often a defensible choice for complex ADAS, structural or restraint-system work because its certification may provide access to relevant procedures, training and specialized equipment. An independent garage can also perform compliant repairs when it demonstrates equivalent technical capability. The safer choice is the repairer that can follow and document the requirements for the exact vehicle.
Advanced driver assistance systems (ADAS) may depend on cameras, radar units, mounting brackets, structural geometry and electronic control modules working together within manufacturer-defined tolerances.
A technician therefore needs more than a scan tool. Certain operations require calibrated equipment, a suitable working environment, accurate vehicle positioning and the manufacturer’s current service information.
Three repairer categories should be distinguished:
- Manufacturer-certified body shops: Repairers assessed against an automotive manufacturer’s applicable certification requirements, which may include equipment, training and repair processes.
- Third-party certified repairers: Garages evaluated under an independent quality or competency scheme. The scope of certification must be checked because it may not cover every manufacturer-specific ADAS operation.
- Independent specialists: Businesses that may have the required vehicle information, calibration equipment and qualified technicians without holding a vehicle manufacturer’s formal certification.
The relevant choice also depends on the work being performed.
| Repair category | Preferred capability | Evidence to request |
|---|---|---|
| ADAS camera or radar repair | Manufacturer-approved repairer or independently equipped ADAS specialist | Vehicle-specific procedure and required calibration results |
| Structural repair or bonded components | Repairer with the required structural methods, materials and equipment | Structural repair references, measurements and material records where applicable |
| Airbag or pretensioner work | Repairer qualified for manufacturer-specific restraint-system operations | Replacement and diagnostic records consistent with OEM instructions |
| Electronic module replacement | Garage capable of required programming, configuration and initialization | Programming records and relevant verification results |
| Minor cosmetic work | Qualified local garage when no related safety-system operation is required | Work scope and confirmation of any manufacturer-mandated checks |
Cost should be considered alongside technical capability. There is no universal price difference between certified repairers and independent specialists. An apparently cheaper quote may exclude diagnostics, calibration or other required operations, making direct comparison misleading.
Ask both businesses to quote for the same documented scope, including any work subcontracted to calibration or programming specialists.
Certification also requires scrutiny. A repairer certified for one vehicle manufacturer, repair category or location may not automatically be qualified for another. Likewise, access to an advanced diagnostic device does not establish competence in structural repair.
Even a capable repairer can encounter problems if replacement parts introduce differences that affect sensor positioning, material performance or manufacturer-required system compatibility.
The Non-OEM Parts Shortcut That Can Cause Safety Systems to Misbehave
Replacement parts can influence safety-system operation when their geometry, mounting characteristics or materials affect a sensor’s physical environment. A camera bracket or radar mounting assembly that differs from the intended specification may alter alignment even if the electronic module reports no fault. The relevant question is whether the replacement part meets the manufacturer’s requirements for that application.
A vehicle’s camera or radar does not necessarily measure the physical accuracy of every bracket or surrounding component. It can sometimes communicate normally while its position or detection characteristics fall outside the intended setup.
That creates a critical distinction between electrical functionality and verified system performance. A diagnostic scan may show no communication problem without demonstrating correct sensor geometry.
Replacement parts generally fall into three categories:
- OEM parts: Components supplied through the vehicle manufacturer’s original equipment channel and specified for the relevant application.
- Aftermarket parts: Components supplied outside that channel. Their suitability depends on design, specifications, compatibility and any manufacturer restrictions.
- Used or reclaimed parts: Previously installed components whose condition, history and eligibility for reuse must be evaluated against manufacturer instructions.
These categories do not establish a universal quality ranking. An appropriate aftermarket cosmetic component may be suitable, while a damaged or incompatible OEM component may not be.
Material differences can also matter. A bumper cover may appear cosmetic but, when radar sensors operate through it or attach to it, its material, thickness, coatings or mounting geometry may be relevant. Structural panels, reinforcement components and adhesive-bonded joints can have additional manufacturer requirements unrelated to sensor alignment.
Consider a hypothetical repair in which a radar bracket is replaced with a component that fits the vehicle but positions the sensor differently. The diagnostic system might recognize the radar electronically, while the physical installation fails to meet the required alignment specification.
This example does not establish that every aftermarket bracket is inaccurate. It illustrates why installation compatibility must be assessed rather than inferred from physical fit alone.
A practical selection rule is to prioritize OEM parts or manufacturer-validated alternatives when the component directly affects restraint systems, sensor positioning, critical structural performance or a manufacturer-restricted repair. Where the manufacturer permits other components, suitability should be established through specifications and the applicable repair process.
For purely cosmetic items without relevant interfaces or structural functions, more options may be reasonable. However, owners should not classify a component as cosmetic solely because it is externally visible.
When a repair changes sensor positioning or related components, correctly selected parts are only the starting point. The next issue is whether the completed system requires calibration and how that calibration is documented.
When Should You Insist on Calibration Proof After Repairs to Avoid Hidden Faults?
Request calibration proof whenever the vehicle manufacturer’s instructions require camera, radar or other system calibration following the work performed. Typical triggers can include windscreen replacement, sensor removal, structural repairs, certain suspension operations and electronic module replacement. Not every operation in these categories automatically requires calibration; the obligation depends on the vehicle and its published service procedures.
Calibration proof is a record of a required technical operation, not a verbal assurance. It helps establish which system was calibrated, which method was used and whether the equipment reported successful completion.
A useful record should identify the vehicle, calibration date, system involved, method, completion status and the workshop or technician responsible. Equipment identification and target or measured values should also be retained when available or required by the applicable procedure.
No single certificate format applies to every vehicle manufacturer or calibration tool.
| Repair event | Why calibration may be needed | What to verify |
|---|---|---|
| Windscreen replacement | Camera mounting position or optical conditions may change | Whether the manufacturer specifies camera calibration after glass replacement |
| Camera or radar removal | The sensor may lose its specified orientation | Required aiming, initialization or calibration steps |
| Structural repair | Sensor mounting geometry or body reference points may be affected | Relevant dimensional checks and sensor calibration requirements |
| Suspension or alignment work | Vehicle geometry may affect systems using directional or positional references | Whether the specific operation triggers an ADAS or steering-related calibration |
| Control-module replacement | New electronics may require configuration, initialization or calibration | Programming, setup and required post-repair verification |
Technicians must also distinguish static from dynamic calibration.
Static calibration generally uses specified targets, positioning equipment and controlled workshop conditions. Dynamic calibration generally involves driving under manufacturer-defined conditions while the system completes its required learning or adjustment process.
Some vehicles require one method, some require the other, and certain procedures involve both. These methods cannot be treated as interchangeable.
A completed diagnostic scan does not replace an applicable calibration, and a successful calibration report does not necessarily replace the required post-repair diagnostic assessment.
Documentation becomes particularly valuable if a warning later appears, the vehicle changes ownership or the quality of a previous repair needs to be reviewed. It creates a record of what was actually done, although it is not a guarantee against future malfunction or an automatic determination of insurance or warranty coverage.
If the repairer cannot produce a report, ask which procedure applied and how its completion was established. Where calibration was required but cannot be verified, have the vehicle assessed by a qualified repairer before relying on the affected driver assistance feature.
Windscreen replacement provides a particularly clear example because a routine glass repair can affect a camera’s installation without involving visible collision damage.
When Should You Recalibrate Cameras After a Windscreen Replacement to Avoid Repeat Faults?
Forward-facing cameras should be recalibrated after windscreen replacement whenever the vehicle manufacturer requires it, even if the camera itself has not been replaced. Removing or reinstalling a camera, changing its mounting position or replacing the glass can trigger calibration requirements. The correct decision must come from the manufacturer’s instructions for the specific vehicle and equipment.
Many modern forward-facing cameras sit near the interior rearview mirror and observe the road through a designated area of the windscreen. The camera’s position, mounting interface and optical path can influence its intended operation.
Replacing the glass may involve removing or disturbing the camera assembly. Even where the module remains intact, a new windscreen introduces a mounting and optical configuration that must meet the vehicle manufacturer’s specifications.
The I-CAR technical article on calibration after windshield replacement explains that windscreen-related operations can trigger manufacturer-specific ADAS calibration requirements. It also distinguishes identifying those requirements from accessing the full repair instructions.
Two situations deserve particular attention:
- The camera was removed, repositioned or replaced. Check the manufacturer’s instructions for the required calibration or initialization steps. Do not assume that reinstalling the same camera eliminates the requirement.
- The camera remained installed while the glass was changed. Check the manufacturer’s windscreen replacement procedure. Calibration may still be specified even without an intentionally altered camera position.
The second situation is frequently misunderstood because an undisturbed electronic module is not necessarily equivalent to an unchanged camera installation or optical environment.
If an ADAS warning returns after replacement, the correct response is to examine the new fault codes, relevant calibration records, glass compatibility and camera mounting conditions. Repeating the entire glass repair without identifying the cause may not resolve the problem.
A warning-free dashboard is also insufficient evidence that every manufacturer-required step was completed.
Before scheduling glass replacement, provide the repairer with the vehicle identification number or equivalent vehicle details and ask whether the specific configuration requires static calibration, dynamic calibration or both.
Afterward, request confirmation that the correct glass specification was installed and that any required calibration was completed successfully. If the glass company subcontracts calibration, identify the specialist responsible and obtain the relevant record.
The same principle applies beyond cameras: seemingly conventional mechanical operations may depend on electronic states and manufacturer-specific service sequences.
Why Can a Brake Job Go Wrong if the Electronic Service Mode Isn’t Used?
A brake job can go wrong when a technician services an electronic parking brake without following the required manufacturer-specific sequence. On applicable vehicles, a dedicated service mode allows components to be serviced in the intended operating state. Skipping that procedure or using an unsuitable method can create a risk of mechanical damage, incorrect operation or incomplete system initialization.
Traditional brake servicing involves physical components such as discs, pads, calipers and hydraulic mechanisms. Electronic parking brake systems add motors, electrical controls and vehicle-specific operating logic.
Some systems require technicians to enter a maintenance or service mode before working on rear brake components. The method and necessary precautions differ by vehicle design.
For example, the Ford owner’s manual on electronic parking brake maintenance mode documents a special electronic parking brake state intended to permit brake servicing. It also identifies separate conditions involving parking brake malfunctions and incomplete application or release.
This demonstrates that brake maintenance can require a defined electronic operating condition. It does not mean every vehicle uses the same activation method or that omitting a particular mode will inevitably damage its brakes.
Where service mode is required, forcing a mechanism against its intended operating state may damage components or prevent correct servicing. The specific consequences depend on the caliper design, the work attempted and the manufacturer’s procedure.
Nor should a missed service step automatically be blamed for a later hill-start or emergency-braking problem. Those functions may involve several systems and require diagnosis before establishing a cause.
Owners can ask three practical questions before authorizing the repair:
- Does this vehicle require electronic parking brake service mode for the planned brake work?
- Will the workshop use the vehicle-specific procedure to enter and exit that mode?
- How will correct parking brake operation and any required electronic checks be verified afterward?
The completed work record should identify the brake components serviced and any manufacturer-required electronic operations. If the parking brake displays a warning, fails to apply or release normally, or behaves unexpectedly after the repair, avoid relying on the system until it has been properly inspected.
This is not an isolated electronic complication. It illustrates how manufacturer-specific service information now influences maintenance tasks that once appeared largely mechanical.
Key takeaways before your next repair
- Ask the repairer to identify manufacturer-required electronic operations before approving a job that appears mechanical.
- Compare quotes by their complete technical scope, including setup, diagnostics and verification, rather than by parts and labour alone.
- Keep the procedure reference and completed work records together so future technicians can understand what was serviced and verified.
Why Manufacturer-Specific Protocols Matter Even for “Simple” Jobs Like Brakes
Manufacturer-specific protocols matter during routine brake servicing because modern mechanical components often operate within electronic control systems. Correct replacement parts and mechanical installation are necessary but may not be sufficient. Depending on the vehicle, safe completion also requires prescribed service modes, torque specifications, initialization steps, diagnostic checks and verification of the completed repair.
A generic brake repair guide may explain basic mechanical principles, but it cannot establish the exact requirements for every vehicle. Manufacturers can specify different methods for closely related models, model years or equipment configurations.
The correct procedure may address component removal, approved tools, fastener replacement, tightening specifications, lubrication restrictions, electronic maintenance modes and post-service checks.
The relevant standard is the procedure applicable to the vehicle being repaired. A technician should not assume that experience with a similar model establishes the requirements for another configuration.
This is particularly important when braking work interacts with electronically controlled parking brakes or other related systems. However, not every brake service requires electronic calibration, and routine maintenance should not be described as universally dependent on complex programming.
The practical distinction is between performing the operations the vehicle actually requires and adding unnecessary procedures based on assumptions.
Owners should therefore compare workshop estimates on three points: whether the correct manufacturer information has been consulted, whether the quote includes all applicable electronic and mechanical operations, and how the completed work will be checked.
A low initial estimate is not automatically unsafe, just as a higher-priced repair does not guarantee technical compliance. The scope and quality of the work determine whether the comparison is meaningful.
Warranty concerns also require precision. Following the manufacturer’s applicable procedure can help document compliant workmanship, but it does not automatically guarantee warranty coverage. Coverage depends on the relevant warranty terms, the circumstances of the repair and applicable laws in the owner’s country.
Across collision repairs, windscreen replacement and brake servicing, the underlying discipline remains consistent: identify the correct procedure, perform the specified operations and retain evidence of the results.
Repeatability depends on those records. A future technician should be able to determine which procedure was applied, which parts were used, what diagnostics were performed and whether any required calibration or initialization was successful.
Before authorizing the next repair, ask the workshop to identify the applicable manufacturer procedure and explain what verification records will be available afterward. Before collecting the vehicle, review those records, request explanations for unresolved faults and arrange further assessment wherever required safety checks remain incomplete.
Can a car be unsafe after a 15 mph crash even if no airbags deployed?
Yes. Airbag deployment depends on impact characteristics and the vehicle’s system design, not speed alone. Non-deployment does not rule out damage to sensors, mounting structures, restraint components or other systems. An appropriate collision inspection should determine which checks the manufacturer requires.
Does a clean diagnostic scan prove that ADAS sensors are correctly aligned?
No. A scan can identify detectable faults, but it does not necessarily confirm physical sensor alignment or replace a required calibration. The manufacturer may prescribe additional aiming, measurement or driving procedures before the system can be considered properly verified.
Can an independent garage perform manufacturer-compliant repairs?
Yes, when the garage has access to the appropriate manufacturer instructions, equipment, qualified personnel and required verification methods. Some procedures or parts may be subject to manufacturer-specific restrictions. Ask for evidence of the workshop’s capability for the exact repair rather than relying solely on certification status.
Does using aftermarket parts automatically invalidate a vehicle warranty?
No universal rule applies across English-speaking countries. Warranty coverage depends on applicable law, warranty terms and the circumstances of the component or repair involved. An aftermarket part should also be assessed separately for technical compatibility and compliance with relevant manufacturer repair requirements.
What should an owner do if a repairer cannot provide calibration documentation?
Ask which manufacturer procedure applied, whether calibration was required and how the result was verified. If required calibration cannot be established, arrange an assessment with a qualified repairer. Until the affected system has been appropriately checked, do not assume its driver assistance function is operating as intended.