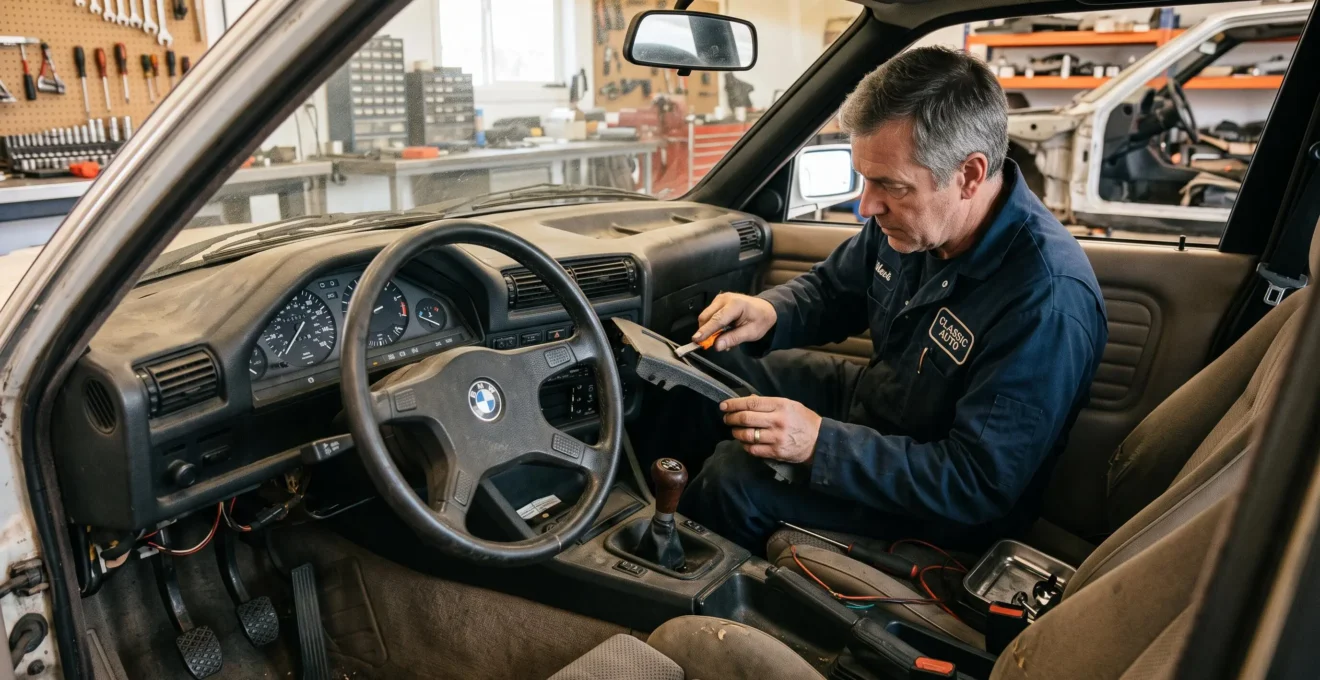
An older car can feel noticeably fresher within seven days without replacing its dashboard, installing expensive electronics or stripping the entire cabin. The most effective interior refinements usually address the things drivers experience constantly: worn contact surfaces, uncomfortable seats, unwanted noise, deteriorated trim and frustrating controls.
The difficulty is knowing which improvements will genuinely enhance everyday driving and which could introduce new problems. A poorly fitted dashboard panel can rattle more than the original. An incompatible infotainment unit may disrupt vehicle electronics. An unsuitable seat modification can interfere with essential occupant-protection systems.
A successful seven-day refurbishment therefore begins with inspection rather than shopping. Existing leaks, damaged clips, electrical warnings and safety defects need attention before cosmetic materials conceal them.
The objective is not to make an ageing vehicle look artificially modern. It is to make the cabin quieter, cleaner, more comfortable and easier to use while retaining the reliability and safety engineering that already works.
Older car interior refinements: what matters most
- Repair deterioration first, then prioritise frequently touched surfaces, seat comfort and irritating cabin noises.
- Choose sound insulation or infotainment according to the main problem experienced during a normal commute, not the most impressive specification.
- Keep seat airbags, electrical circuits and factory controls intact, and resolve moisture or warning lights before completing cosmetic upgrades.
- Why Do Interior DIY Upgrades Create New Rattles Within Weeks?
- How to Prioritise Interior Upgrades So the Cabin Feels Better Fast?
- Sound Deadening or Infotainment: Which Feels More Transformative After 1 Commute?
- The Seat Upgrade Mistake That Triggers an Airbag Light Immediately
- When Should You Fix Damp or Leaks Before Interior Refinements?
- Better Headlights or Better Tyres: Which Improves Night Confidence More?
- Why Does an Electrical Fault Feel Like a Gearbox Problem?
- Why a « Mechanical » Problem Can Actually Be Electrical—and Cost You Twice if Misread
Why Do Interior DIY Upgrades Create New Rattles Within Weeks?
Interior DIY upgrades can create rattles because removing factory trim, adding accessories or changing panel stiffness alters how components move against one another. Worn clips, missing foam isolators and poorly secured wiring may remain quiet initially but begin vibrating after repeated driving. Proper preparation and careful reassembly matter more than simply adding sound-deadening material.
Vehicle interiors are assembled from interconnected plastic panels, brackets, fasteners and cushioning materials. These components are designed to tolerate vibration, temperature changes and small movements without making excessive noise.
Adding an amplifier, insulation sheet or aftermarket accessory can change the mass and stiffness of a panel. That modification may shift its vibration behaviour, exposing contact points that were previously quiet. A new rattle does not necessarily mean the new component itself is defective.
Age makes the problem more complicated. Plastic clips become brittle, foam strips compress and mounting points can wear. A trim panel that survived years of ordinary use may no longer fit tightly after being removed.
Before removing anything, establish where the noise occurs. A controlled road test can distinguish several likely causes without repeatedly dismantling the dashboard.
- Road surface: A noise appearing mainly on rough tarmac suggests movement between components or loose mounting hardware.
- Speed range: A vibration confined to particular speeds may indicate a resonance rather than a permanently loose object.
- Temperature: Noises changing between cold mornings and warm afternoons can reflect thermal expansion of trim components.
- Recent modifications: A sound beginning after an audio or insulation installation deserves inspection near the affected mounting points.
Adhesive preparation is equally important. Old plastics may carry silicone-based dressings, dust and residue that prevent tapes or foam pads from bonding correctly. Clean surfaces using materials compatible with the trim, allow them to dry and replace damaged retaining clips before attaching accessories.
Ensure wiring and added components cannot contact moving mechanisms, sharp edges, pedals or airbag deployment areas. Accessories should be mechanically supported where necessary rather than relying on adhesive alone.
Repeatedly removing panels to investigate avoidable noises can create additional damage. Broken tabs and distorted clip sockets may eventually require replacement trim, making the refurbishment more expensive than the original accessory.
Once existing vibrations and loose fittings are controlled, the next decision is where limited refurbishment time will produce the greatest daily benefit.
How to Prioritise Interior Upgrades So the Cabin Feels Better Fast?
Prioritise interior upgrades by how often a component affects the driving experience, how badly it has deteriorated and how much work the improvement requires. Fix broken or unsafe components first, restore frequently touched surfaces second and reserve purely visual changes for later. This sequence delivers noticeable improvements without creating unnecessary dismantling work.
Consider the contrast between restoring a worn steering wheel covering and repainting an obscure dashboard insert. The steering wheel is used throughout almost every journey. The decorative insert may look better in photographs but contributes comparatively little to physical comfort.
The same logic applies to seat bolsters, gear selectors, door handles, window switches and the surfaces drivers encounter when entering or leaving the car. Quality-led restoration can preserve factory fit and controls while reducing the sensation of wear.
However, frequency is not the only criterion. A sagging headliner, damaged door seal or collapsed seat cushion should generally take precedence over adding ambient lighting or decorative accessories. Cosmetic refinements rarely compensate for an unresolved underlying defect.
The following priority grid is a practical planning tool rather than a measured performance ranking.
| Refinement | Daily benefit | Planning priority |
|---|---|---|
| Repair broken controls and loose trim | Restores everyday function and reduces irritation | First, subject to safety checks |
| Restore steering wheel and gear selector surfaces | Improves frequently used contact points | Early, using compatible materials |
| Repair seat foam or worn upholstery | Improves support and perceived condition | Early, with airbag precautions |
| Address cabin noise and degraded seals | Improves background comfort | After diagnosing the noise source |
| Update infotainment | Improves navigation, media and controls | After compatibility checks |
| Repaint decorative trim | Primarily improves appearance | Last |
A seven-day schedule works best when tasks are grouped according to the panels and assemblies they affect. This minimises the number of times delicate factory fittings must be removed.
Your practical seven-day interior refinement checklist
- Day 1 — Inspect and document: Record warning lights, dampness, rattles, damaged trim and existing control functions. Deliverable: a dated baseline inspection sheet with photographs.
- Day 2 — Resolve prerequisites: Identify broken clips, deteriorated seals and any safety or moisture issues requiring repair. Deliverable: a defect list marked repaired, professionally referred or pending.
- Days 3–4 — Restore high-contact areas: Clean and refurbish compatible trim, accessible controls and non-safety-critical contact surfaces. Deliverable: before-and-after photographs and a working-control check.
- Days 5–6 — Complete selected comfort upgrades: Install only previously checked insulation or infotainment components, grouping work by accessible panels. Deliverable: an installation record, retained fitting information and a function-test checklist.
- Day 7 — Verify the result: Inspect trim fit, warning indicators, controls and road-test behaviour. Deliverable: a final comparison against the Day 1 baseline, including outstanding defects.
This schedule assumes the vehicle passes its initial safety and moisture inspections and that the selected work is realistically achievable. A leak, airbag fault or difficult electrical integration can require specialist intervention and extend the project beyond seven days.
After the most obvious wear has been addressed, the choice between reducing unwanted noise and upgrading digital features becomes much easier to evaluate.
Sound Deadening or Infotainment: Which Feels More Transformative After 1 Commute?
Sound deadening usually feels more transformative when road noise, vibration or poor cabin refinement dominates a commute. Infotainment feels more valuable when outdated navigation, unreliable connectivity or awkward media controls cause daily frustration. Neither is universally better: the right first upgrade depends on the problem experienced most often and the vehicle’s compatibility.
The difference is between ambient comfort and functional comfort. Noise treatment aims to improve the environment in which driving takes place. Infotainment changes how the driver interacts with navigation, audio, calls and other available functions.
To determine the higher-value improvement, complete a normal commute before purchasing either upgrade. Use the vehicle under familiar road and traffic conditions, without deliberately changing driving habits.
Observe whether tyre roar makes conversations difficult, whether interior vibration creates fatigue or whether operating the existing stereo takes attention away from driving. Record the dominant irritation while parked at the end of the journey.
The comparison below identifies likely benefits and integration concerns.
| Criterion | Sound deadening | Infotainment upgrade |
|---|---|---|
| Primary benefit | Potentially reduces transmitted noise and vibration | Improves supported digital interactions |
| Most noticeable when | Road and panel noise dominate | Connectivity or interface problems dominate |
| Main installation challenge | Correct material placement and trim reassembly | Electrical, software and control compatibility |
| Typical failure risk | Added rattles, trapped moisture or excess weight | Electrical faults or loss of factory functions |
| Best first check | Identify the actual noise source | Verify the vehicle-specific integration requirements |
Sound-deadening materials perform different functions. Vibration-damping sheets can reduce panel resonance, while suitable barrier and absorption systems address other aspects of noise transmission. Simply covering every exposed surface is not a reliable method of achieving a quieter cabin.
Material selection, mounting quality and the original noise source determine the outcome. A worn wheel bearing, damaged door seal or unsuitable tyre cannot be properly repaired by adding insulation inside the doors.
There is also an important interaction between audio upgrades and door construction. Better speakers or a more powerful amplifier may expose vibrations in weak trim fittings, loose wiring or poorly secured door components. The result can be louder rattles despite improved audio equipment.
On the infotainment side, factory displays may communicate with steering wheel controls, amplifiers, parking assistance and vehicle networks. Some replacement systems use dedicated vehicle-specific interfaces; others may require more extensive integration.
Avoid improvised wiring splices or unverified connections to vehicle communication circuits. Preserve the original harness wherever an approved, compatible adapter is available, and have complex installations checked by an automotive electronics specialist.
Once the choice is established, install only the components necessary to solve that particular problem. Seat-related modifications demand even greater caution because their electrical connections can be part of the vehicle’s crash-protection system.
The Seat Upgrade Mistake That Triggers an Airbag Light Immediately
One serious seat-upgrade mistake is disturbing a seat-mounted airbag, occupancy sensor or seatbelt pretensioner connection without following the vehicle manufacturer’s service procedure. Depending on the vehicle, this can trigger an airbag warning immediately or after a system check. Incompatible replacement seats and unsuitable covers may also compromise occupant protection even when the cabin looks better.
Modern vehicle seats are not simply mechanical frames covered in upholstery. Depending on the model, they can contain side airbags, electrical adjustment motors, seat heaters, occupant-detection equipment and connections associated with seatbelt restraint systems.
An apparently straightforward seat swap can therefore introduce a fault if the replacement uses different connectors, sensor designs or control-module configurations.
Before buying a replacement seat or aftermarket heating system, verify the following with vehicle-specific parts information and manufacturer documentation:
- Airbag equipment: Confirm whether the original and replacement seats contain compatible side-airbag systems.
- Connector compatibility: Check electrical specifications and circuit functions, not merely whether connectors physically fit.
- Occupant classification: Identify whether the vehicle uses sensors within the cushion, seat frame or another configuration.
- Calibration requirements: Establish whether replacement components need vehicle-specific registration, calibration or diagnostic coding.
- Upholstery compatibility: Confirm that seat covers, heaters and repair materials do not obstruct airbag deployment paths or interfere with sensors.
Manufacturer-specific warnings illustrate why these checks matter. The Tesla Model 3 owner’s manual on front and rear seats warns that front-seat covers can restrict the deployment of seat-mounted side airbags and may interfere with occupant detection where fitted. These warnings apply to the configurations described in that manual, not automatically to every vehicle.
« Do not use seat covers on a front seat. Doing so could restrict deployment of the seat-mounted side airbags if a collision occurs. »
An illuminated airbag warning indicates a fault requiring proper diagnosis. Depending on the system and fault, some occupant-protection functions may be unavailable. The warning should never be dismissed as a harmless consequence of cosmetic work.
If an airbag light appears after a seat modification, stop further modification and arrange an appropriate diagnostic assessment. A qualified technician can use manufacturer-compatible equipment to retrieve stored fault codes and determine whether the cause is a connector issue, damaged component, calibration requirement or incompatibility.
Any connector inspection or repair involving supplemental restraint system circuits must follow the manufacturer-prescribed isolation and handling procedures. Do not probe airbag circuits, fit resistors to suppress warnings or clear fault codes without correcting the cause.
A professionally repaired original seat may offer a better balance of comfort, cost and safety than an uncertain replacement. Before installing new upholstery, however, confirm that the cabin underneath is dry.
When Should You Fix Damp or Leaks Before Interior Refinements?
Fix dampness and water leaks before installing new carpets, upholstery, insulation or sound-deadening materials. A musty smell, recurring condensation or water staining can indicate moisture hidden beneath the visible trim. Covering affected areas before identifying and repairing the source can conceal mould growth, material deterioration and corrosion-related problems.
Older vehicles can admit water through several areas. Common points worth inspecting include damaged door seals, deteriorated door membranes, windscreen bonding, blocked drainage channels, sunroof drains and boot seals.
The presence of moisture near a particular panel does not prove that water entered at that location. Water can travel along body structures, wiring paths and interior trim before collecting in the lowest accessible area.
A controlled water test can help identify an entry point. With a helper observing the interior, introduce water gently around one suspected external area at a time, using a method suitable for the vehicle. Avoid directing high-pressure water into electrical equipment, air intakes or sensitive seals.
Inspect accessible carpet edges, spare-wheel wells and affected trim cavities for evidence of moisture. Where necessary, a professional can safely expose additional areas to identify the path of water ingress.
The relationship between moisture and mould is well established beyond automotive applications. The EPA recommendations on moisture and mold prevention emphasise repairing leaks and drying affected materials. The agency’s general guidance concerns buildings and indoor furnishings; it is not a vehicle-specific drying standard.
For car interiors, the practical implication is to address water entry before concealing susceptible materials. Carpet underlay and some absorbent insulation products can retain moisture. Other sound-treatment materials behave differently, so their moisture performance should be checked rather than assumed.
Do not rely on a dry-looking carpet surface. Moisture can remain in underlying padding, seams and concealed cavities. Damaged absorbent materials may require professional cleaning or replacement, depending on their condition.
The readiness test is straightforward: the leak source has been repaired, affected assemblies have been thoroughly dried, no relevant moisture remains and a suitable repeat water test or subsequent rainfall confirms that water is no longer entering.
If the source remains uncertain, postpone insulation and upholstery installation. A seven-day cosmetic deadline is less important than avoiding concealed damage.
A dry interior provides a sound foundation for refurbishment. The next essential check concerns external driving safety, particularly for owners who regularly drive after dark.
Better Headlights or Better Tyres: Which Improves Night Confidence More?
Better tyres improve night-driving confidence when grip, braking or wet-road traction is the limiting factor. Better headlights help when inadequate illumination makes hazards difficult to detect. They address different risks and cannot substitute for one another. Before spending money on interior refinements, inspect both and correct whichever presents a safety or legal compliance problem.
Night-driving confidence is not simply a question of how brightly the road is illuminated. A driver also needs sufficient traction to steer and brake safely after recognising a hazard.
Tyres influence the vehicle’s contact with the road. Their condition, inflation pressure, construction and suitability for the conditions affect grip and handling. Worn or damaged tyres can undermine confidence regardless of headlight quality.
Headlights determine how effectively the driver can see the road ahead under dark conditions. Yellowed lenses, failed bulbs, damaged reflectors and incorrect beam alignment can reduce useful illumination or create glare for other road users.
Start with a practical safety inspection:
- Measure tyre tread using an appropriate depth gauge, following applicable local requirements.
- Check tyre sidewalls for cracks, cuts, bulges and other visible damage.
- Verify inflation pressures against the vehicle manufacturer’s specification.
- Inspect headlights for lens deterioration, damage and correct operation.
- Observe beam alignment for obvious abnormalities, then obtain a professional alignment check where needed.
Legal standards differ across English-speaking countries. For example, UK government vehicle safety checks specify a minimum tread depth of 1.6 mm for cars, light vans and light trailers across the central three-quarters of the tread and around its circumference. This is a UK legal requirement for the stated vehicles, not a universal international rule or a guarantee of optimal wet-weather performance.
1.6 mm
Minimum UK legal tyre tread depth for the specified vehicle categories, across the required tread area. A legal minimum should not be confused with the tread condition offering the best available grip.
UK Government, Check your vehicle is safe to drive.
Headlight upgrades also need a compatibility and legality check. More powerful bulbs are not automatically better, particularly if their light distribution creates glare or their installation is not approved.
The DVSA MOT inspection manual for vehicle lighting covers lamp condition, operation, alignment and compatibility. Its October 2026 requirements allow certain ECE-approved LED replacement light sources in compatible halogen headlamp units under specified conditions, including the required approval documentation. Incompatible modifications remain unacceptable.
These are UK inspection requirements. Drivers in the United States, Canada, Australia and other markets must consult the rules applicable to their vehicle and jurisdiction.
Once essential roadworthiness is established, attention can return to interior electronics. Understanding how vehicle systems communicate is particularly important when unexpected driving symptoms appear after electrical work.
Why Does an Electrical Fault Feel Like a Gearbox Problem?
An electrical fault can resemble a gearbox problem because many modern transmissions depend on electronic sensors, control modules and actuator commands. Weak electrical supply, poor connections or incorrect sensor information may contribute to harsh shifts, delayed engagement or reduced-performance modes. These symptoms do not prove internal gearbox damage, so electrical checks should precede expensive mechanical replacement decisions.
Older automatic transmissions may still depend on electronic control for shift timing, operating pressure and protective strategies. In newer vehicles, the interaction between transmission, engine and stability-control systems can be even more extensive.
A sensor fault or unstable supply voltage can affect the information used by these systems. Depending on the vehicle, the resulting behaviour may resemble clutch wear, hydraulic faults or other mechanical deterioration.
For instance, a wheel-speed signal may be used by several vehicle systems. If that information becomes unreliable, related warning indicators or changes in driving behaviour can accompany the fault. The exact consequences depend on the vehicle architecture.
That is why replacing transmission components solely because a vehicle jerks or shifts unusually is a poor diagnostic shortcut.
A more defensible inspection sequence begins with relatively accessible evidence:
- Battery and charging system: Test battery condition and charging performance against the vehicle manufacturer’s specifications.
- Stored diagnostic information: Retrieve relevant fault codes from the appropriate vehicle control modules and preserve freeze-frame information where available.
- Electrical connections: Check relevant grounds, connectors and wiring for damage or poor contact, following safe service procedures.
- System-specific diagnosis: Evaluate the sensor, actuator or communication fault indicated by the evidence.
- Mechanical assessment: Investigate internal transmission faults when the diagnostic findings support that direction.
Not every harsh shift is electrical. Low fluid pressure, internal wear and mechanical damage remain legitimate possibilities. The aim is to establish evidence before authorising major repairs, not to assume that an inexpensive electrical fault explains every symptom.
This distinction becomes especially relevant during a seven-day interior project. Battery disconnection, accessory wiring changes and disturbed connectors may introduce warning states or disrupt vehicle-specific settings. Some cars require particular reconnection, initialization or calibration procedures.
Keep a record of battery work, electrical modifications and any new warnings. If abnormal driving behaviour appears afterwards, that timeline can help a qualified technician investigate the correct systems.
Do not continue driving a vehicle that exhibits unsafe shifting, unpredictable acceleration, loss of power or other behaviour that compromises control.
The gearbox example illustrates a wider diagnostic problem: in electronically controlled vehicles, the part producing a symptom is not necessarily the part causing it.
Key takeaways before the final diagnosis
- A new fault appearing after an upgrade should be investigated in relation to the work performed, without assuming the upgrade is automatically responsible.
- Intermittent symptoms affecting multiple systems justify checking shared electrical supplies, connections and diagnostic information.
- A complete record of modifications, warning indicators and symptom timing helps distinguish integration problems from unrelated mechanical defects.
Why a « Mechanical » Problem Can Actually Be Electrical—and Cost You Twice if Misread
A mechanical-looking problem can originate in a sensor, electrical connection or control module because modern vehicles coordinate many physical functions electronically. Misreading the symptom can lead to two separate expenses: replacing a functioning mechanical component and later repairing the electrical fault that caused the behaviour. Diagnosis should establish the failure mechanism before parts are replaced.
A vehicle is an interconnected system. Sensors measure conditions, control units interpret information and mechanical or electrical actuators respond. When the information is wrong, the resulting physical behaviour can look like hardware failure.
That does not make mechanical problems rare or unimportant. It means that symptoms alone are insufficient evidence to select a replacement component.
Several characteristics make electrical investigation particularly relevant:
- A problem appears intermittently rather than following a consistent mechanical pattern.
- Several unrelated functions begin showing warnings or abnormal behaviour at the same time.
- The symptom begins soon after accessory installation, battery work or connector disassembly.
- Diagnostic information indicates communication, supply-voltage or sensor-related abnormalities.
These clues justify investigation; none independently confirms an electrical cause.
Consider an explicitly hypothetical example. An owner installs an aftermarket infotainment unit and later notices intermittent dashboard warnings alongside unusual transmission behaviour. A repair estimate focuses on the transmission without examining the recent electrical changes.
If the transmission is replaced but the original wiring problem remains, the owner could pay for an unnecessary component and then face the cost of locating and correcting the actual electrical fault. The replacement itself may then be incorrectly blamed when the symptoms continue.
This scenario illustrates the potential financial consequence of misdiagnosis. It is not a documented case study or proof that a particular infotainment modification causes transmission faults.
Within a seven-day interior refurbishment, the best protection is traceability. Document every accessory fitted, panel removed, electrical connection changed and warning observed. Retain installation instructions and identify which factory functions were tested before and after the work.
Where possible, select compatible, reversible installations that preserve original connectors and wiring. Avoid disabling warnings, bypassing safety circuits or modifying vehicle networks without a verified, vehicle-specific procedure.
An upgrade is not complete simply because the new feature operates. The vehicle’s original controls, safety indicators and driving behaviour must also remain satisfactory.
Start the next refurbishment with a baseline inspection, choose one meaningful comfort improvement and verify the vehicle after each installation stage. If warning lights, moisture or unexplained driving symptoms remain, resolve them before adding more accessories. A refreshed older car should feel better because its systems work together—not because new trim hides unresolved faults.
Can an older car interior really feel new after seven days?
An older car can feel significantly fresher after a week of targeted cleaning, minor trim repairs, contact-surface restoration and carefully selected comfort improvements. The result depends on its initial condition, available parts and the work required. Extensive upholstery reconstruction, water-damage repairs or complicated electronics may take longer.
Which interior improvements are safest for a beginner?
Thorough cleaning with material-compatible products, replacing ordinary floor mats with correctly secured vehicle-specific items and repairing accessible non-safety-critical trim can be reasonable starting points. Avoid work involving airbags, seatbelt systems, pedals, electrical harnesses or unfamiliar seat assemblies without suitable professional expertise.
Should the original infotainment system be kept after installing better speakers?
Keeping the original head unit can be sensible when it functions reliably and the proposed speaker improvements are compatible with its electrical output and factory amplifier configuration. Check impedance, wiring and system integration before purchasing equipment. A complete infotainment replacement is not necessary for every audio upgrade.
How can owners tell whether sound insulation has worked?
Compare the same vehicle on a familiar route before and after installation, using similar speeds, surfaces, tyre pressures and ventilation settings. Record whether the original noise or vibration has decreased and whether new rattles have appeared. A repeatable sound measurement can provide additional information, but uncontrolled phone readings should not be treated as laboratory-grade acoustic evidence.
When should an interior refurbishment be left to a professional?
Professional assistance is appropriate when work involves supplemental restraint systems, seat occupancy detection, structural seat components, complex vehicle electronics, persistent water ingress or unexplained warning indicators. These repairs require appropriate diagnostic information, tools and verification procedures. Cosmetic improvements should never take precedence over restoring safe vehicle operation.